
April 17, 2024
With its timeless appeal and easy installation, shiplap instantly adds character and warmth to any room, including the bathroom.
Transforming your bathroom into a restful retreat with style and elegance is easier than you think, and it all starts with a shiplap ceiling.
In this step-by-step guide, we’ll walk you through the process of adding character to your bathroom with this timeless design element.
It’s week 3 of the One Room Challenge and we’re excited to share our progress with this bathroom renovation.
As a reminder you can easily navigate through each week of this master bathroom renovation by clicking on the links below.
Week 1 | Week 2 | Week 3 you’re here | Week 4 | Week 5 | Week 6 | Week 7 | Week 8
If you’re looking for ideas for updating or renovating your home, be sure to head over to their website and see all of the amazing participants this season.
This week we’ll walk you through the entire process of installing a shiplap bathroom ceiling.
From gathering materials to the final coat of paint and each stage is straightforward.
Are you ready to elevate your space with the charm and simplicity of a shiplap ceiling?
Table of contents
[show]
- Week 3 Bathroom Renovation Progress
- Is It Expensive to Shiplap a Ceiling?
- Does Shiplap Ceiling Make Room Look Bigger?
- How to Install a Shiplap Bathroom Ceiling
- Supplies
- Mark Ceiling Rafters
- Plan Your Layout
- Install Shiplap Ceiling
- Prep & Paint Shiplap
- Wood Filler & Caulk
- Paint Shiplap Bathroom Ceiling
- Shop This Project
- Final Thoughts
- Bathroom Remodel To Do List
Week 3 Bathroom Renovation Progress
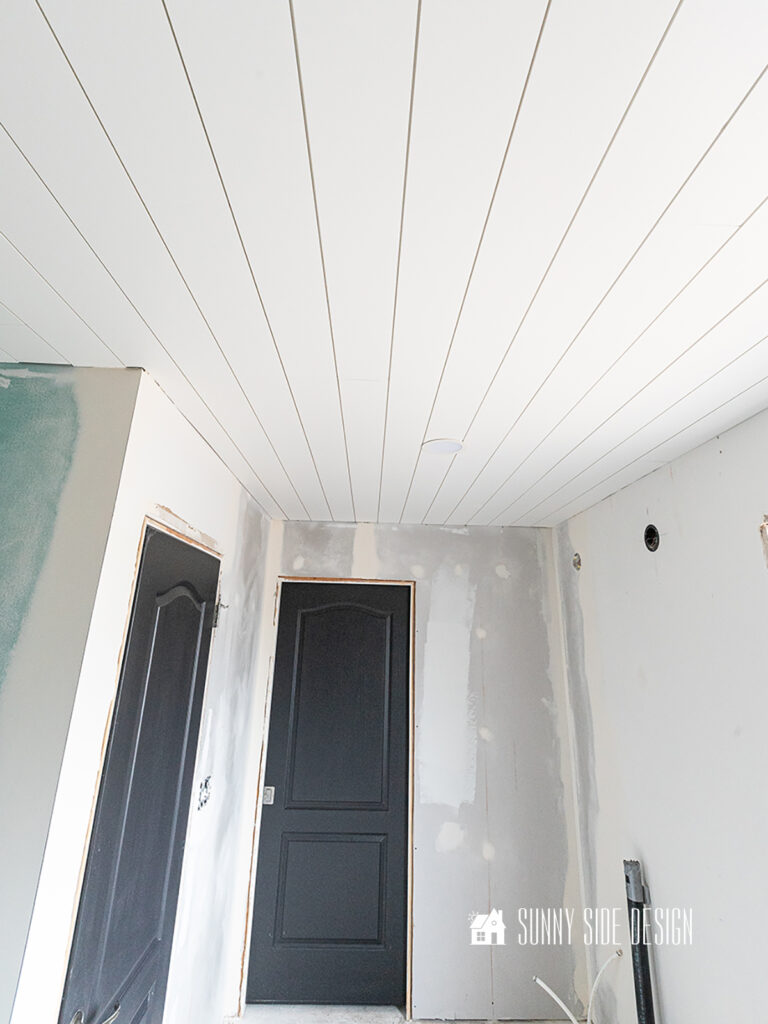
Before we dive into our project installing a shiplap bathroom ceiling, let’s take a look at the progress we’ve made in the room.
First of all, most of the new plumbing is installed in the bathroom! Yeah!
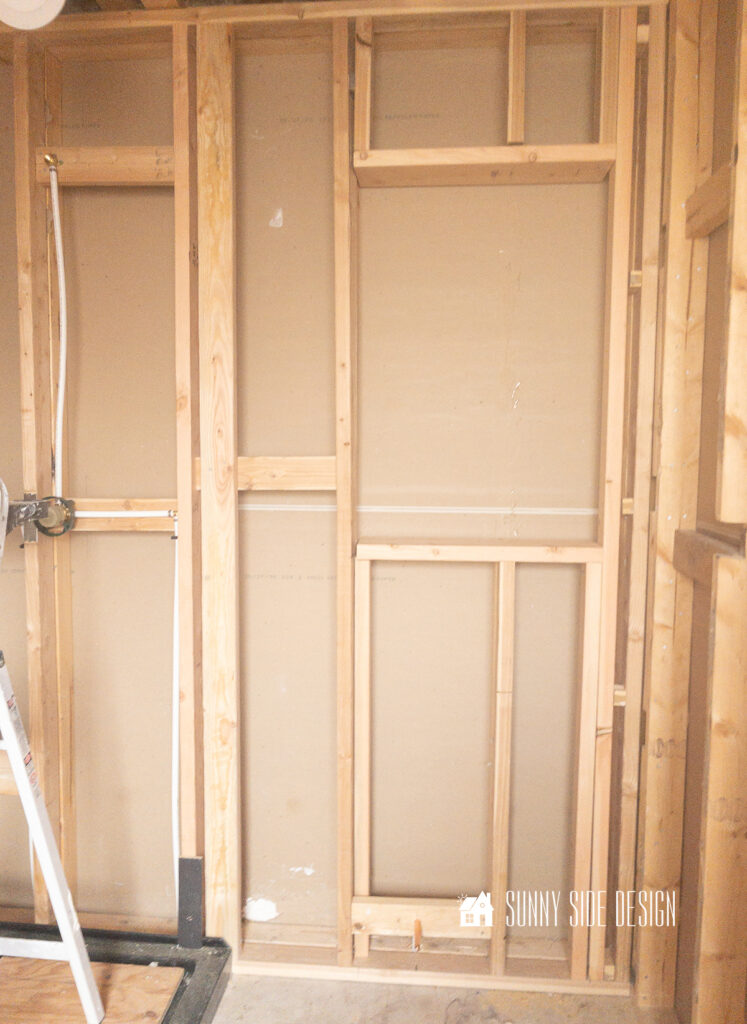
If you remember from last week we needed to frame out the wall another 3 1/2″ to accommodate the drains for the shower and toilet.
Then I started thinking . . .
and that can be dangerous!
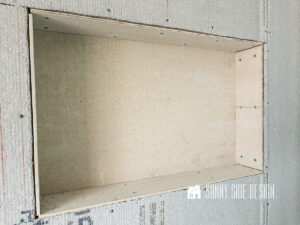
Why not install recessed shelves into the wall above the toilet.
I was already planning on shelves, but I loved the idea of recessing them between the studs.
It will be similar to the built-in wall shelves we created for our hairdresser.
So we cut one of the studs that we installed last week and framed for the recessed shelves.
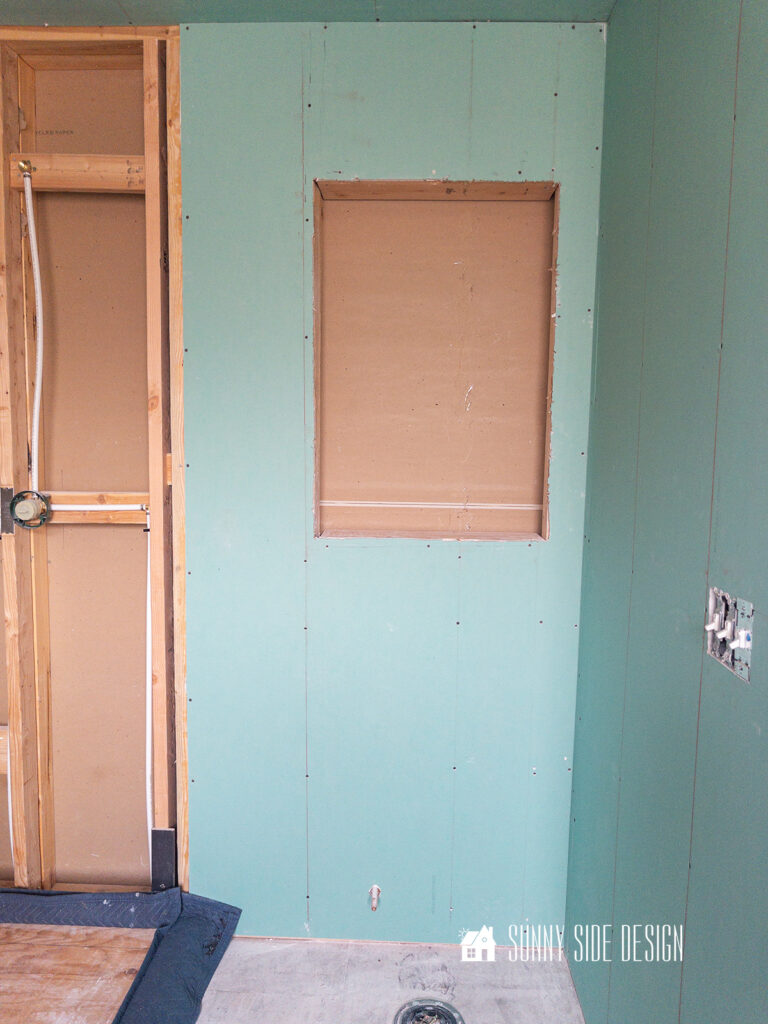
Once the shelf area was framed out we began to install the new drywall.
This was our first time installing drywall and let’s say we were pretty slow at it.
But after two days of work, it’s finally finished.
While it wasn’t a lot of area that needed new drywall, it was a challenge to correctly measure and cut out for various obstacles in the wall.
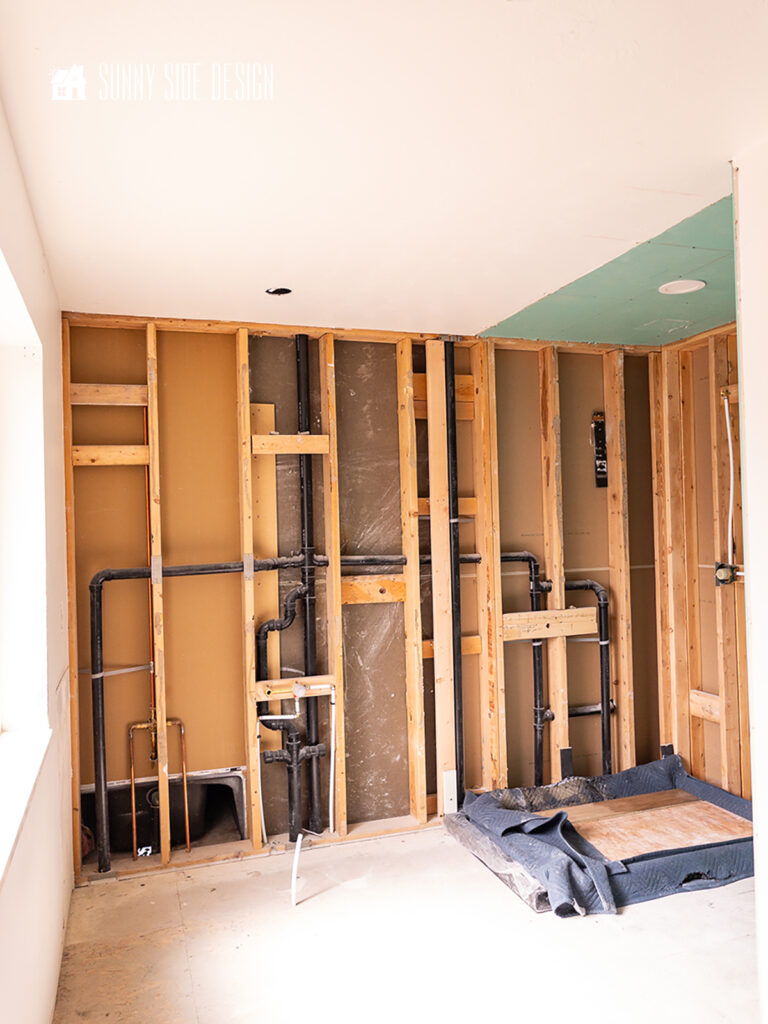
Now ideally we should have installed the tile backer board on the tub and shower wall before the shiplap, but we weren’t quite ready for that.
I just couldn’t decide on how I wanted the shower niche to look.
So you have that to look forward to next week!
Enjoying this post, please Pin it, save it for later and share it with a friend.
Sharing is caring!
Is It Expensive to Shiplap a Ceiling?
Shiplap was not my first choice for the bathroom ceiling, I had my heart set on a charming beadboard ceiling.
Ever since I installed beadboard in my laundry room, I’ve wanted to add it to more rooms in my home.
I love the cozy cottage feel it adds.
I thought a beadboad ceiling would be cute and add character to this space.
In my laundry room we installed the 4×8 beadboard panels.
They are inexpensive and easy to install.
However with the layout of my master bathroom, I couldn’t find a way to make it look right and still cover the butt seams.
So I began looking for tongue and groove beadboard and I was shocked at the price for my bathroom ceiling.
I only need about 100 square feet and the price was over $1000.
After pricing out the shiplap, I was sold.
Primed nickle gap shiplap planks for my bathroom is only $250.
That’s a significant savings.
So shiplap it is!
Not only do I still get the charm of a paneled ceiling, but I also do not have to stress about trying to match the textured ceiling with all the repairs we made.
A win, win for sure!
Does Shiplap Ceiling Make Room Look Bigger?
Do you think shiplap will make a room feel bigger?
Shiplap undoubtedly adds character and visual interest to a space and can create the illusion of expanded dimensions by drawing the eye upward.
In addition, the horizontal lines of the shiplap can elongate the walls, enhancing the sense of openness in the room.
It would be similar to how we made Gavin’s small bedroom feel larger by extending the board and batten around to the side walls.
Ultimately, when you install a shiplap ceiling it can create a brighter, airier feeling, making the room feel more expansive and inviting.
If you’re new here, welcome! We’re so glad you’re here.
Let us introduce ourselves, we’re Michelle and Steph, a mom and daughter team who love to DIY and decorate our homes.
Not only are we passionate about making our homes warm, comfortable and unique, but it’s our mission to help you create that same feeling in your own home.
You’ll find ideas for repurposing, creating, decorating and making your home truly yours, while always mindful of a tight budget.
Undoubtedly we love finding ways to make your home look high-end on a small budget.
Plus you’ll also find a recipe or two as we share our family favorites with you.
We’d love it if you’d join our community of doers so you won’t miss any inspiration for your home.
We love new friends.

How to Install a Shiplap Bathroom Ceiling
Supplies
First you’ll want to gather your supplies and tools.
You’ll need nickle gap primed MDF shiplap, which comes in 8′ or 12′ lengths.
For our bathroom it was more economical to purchase the 12′ boards.
It’s primed, so you’ll only need to paint.
We also used painter’s tape, 2″ brads, wood filler and a sanding sponge.
To install the shiplap you’ll need a saw, we used our miter saw, but you could also use a circular saw.
When installing a shiplap bathroom ceiling, you’ll also need a saw to cut out for light boxes and exhaust fan.
We used a DeWalt cut out tool, that Steph used for cutting out the shiplap for the can lights in her basement.
But you could also use a jig saw to make the cuts
Sunny Side Design is a participant in the Amazon Services LLC Associates Program, an affiliate advertising program designed to provide a means for sites to earn advertising fees by advertising and linking to Amazon.com. As an Amazon Associate, this blog earns from qualifying purchases with no additional cost to you. Click here to read our full disclosure policy.
Okay, let’s get started installing a shiplap bathroom ceiling!
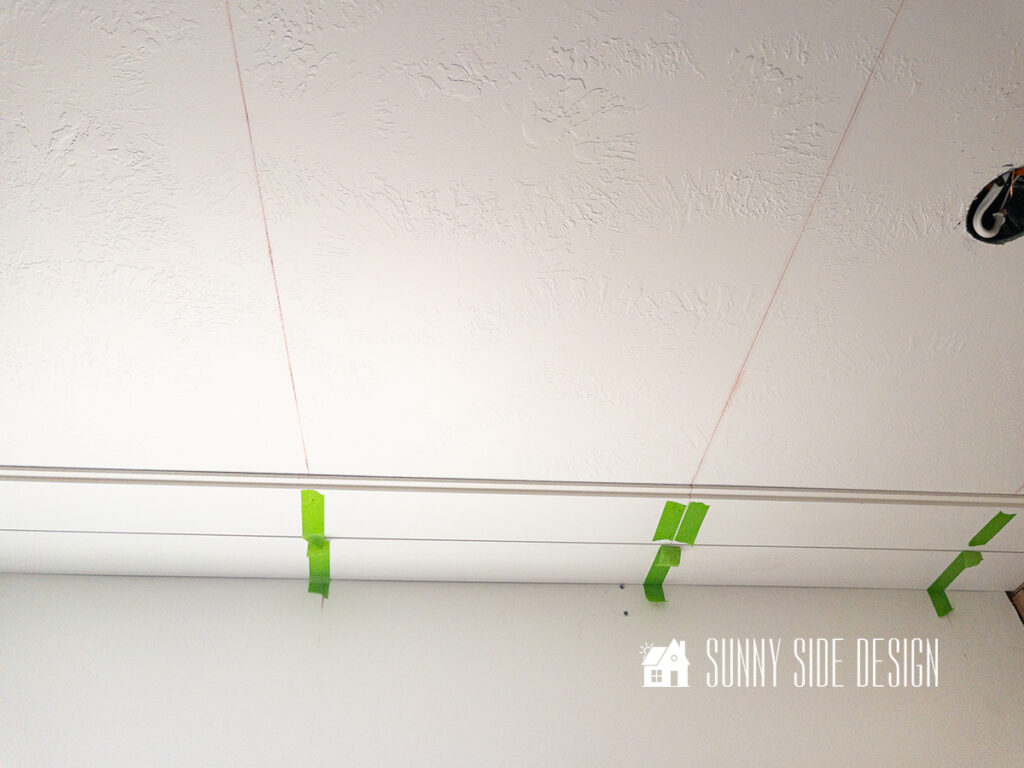
Mark Ceiling Rafters

Your shiplap ceiling will need to be install into the ceiling rafters.
Locate them with a stud finder.
And then make a chalkline across the ceiling.
This way you can easily identify where you need to place your brad nails into the shiplap.
Plan Your Layout
You’ll want to plan the spacing for your shiplap before you begin to install them.
The shiplap we used shows the dimensions as 6″ x 12′, but the actual measurement is 5.75″ x 12′.
However there will be a 1/4 overlap, so the width of each board will only span 5.5″
So to plan the layout for our bathroom we took the width of our room, which is 121″ and divided it by 5.5″.
That means our room would take exactly 22 boards to cover the width of the room. We didn’t need to make any adjustments.
But if your room will have a vary narrow piece at one side, I’d suggest you trim down your first row to make it more equal on both sides of your room.
Install Shiplap Ceiling
The shiplap boards will need to run perpendicular to ceiling rafter.
Begin on one side of your room and install the first row.
If your room is smaller than 12′ you will not need to make butt seams.
Our room is about 12.5′ so we staggered our butt joints.
If you need to make butt joints, you want to place them at a rafter, so both ends will be secured into a ceiling rafter.
Also we are planning on installing crown moulding, so we will not be too concerned with getting a tight fit on each side of the wall.
Place the flat side of the shiplap against the wall and secure to each rafter with 2″ brad nails.
To install the second row, place lap portion of the shiplap board over the tongue, make sure it’s pressed tight against the previous board and place 2 brad nails into each rafter.

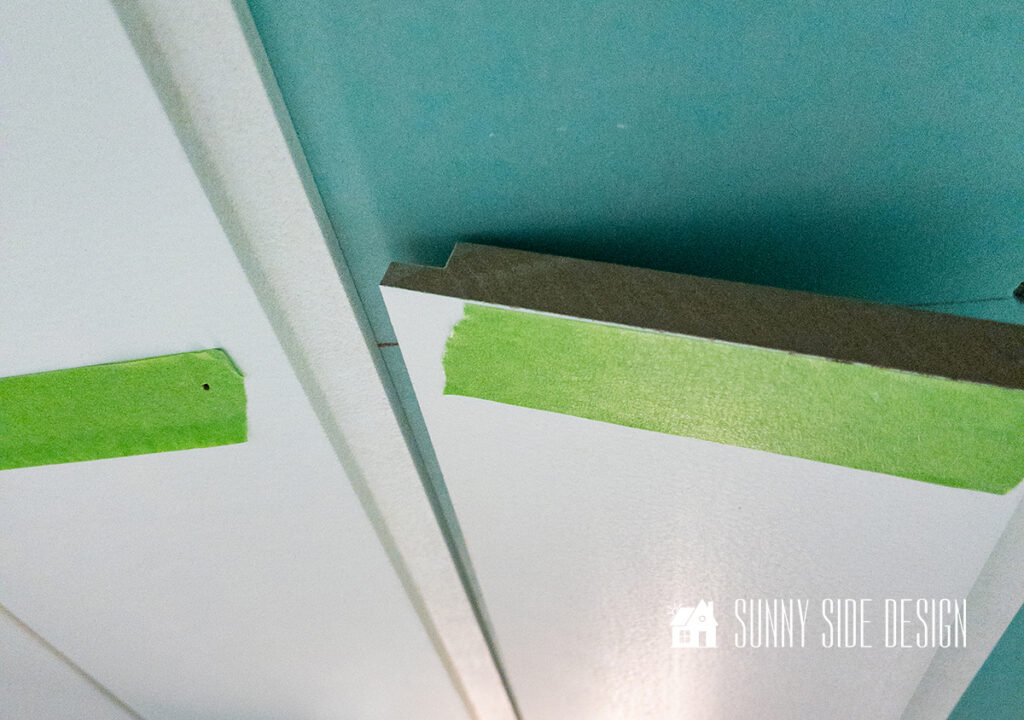
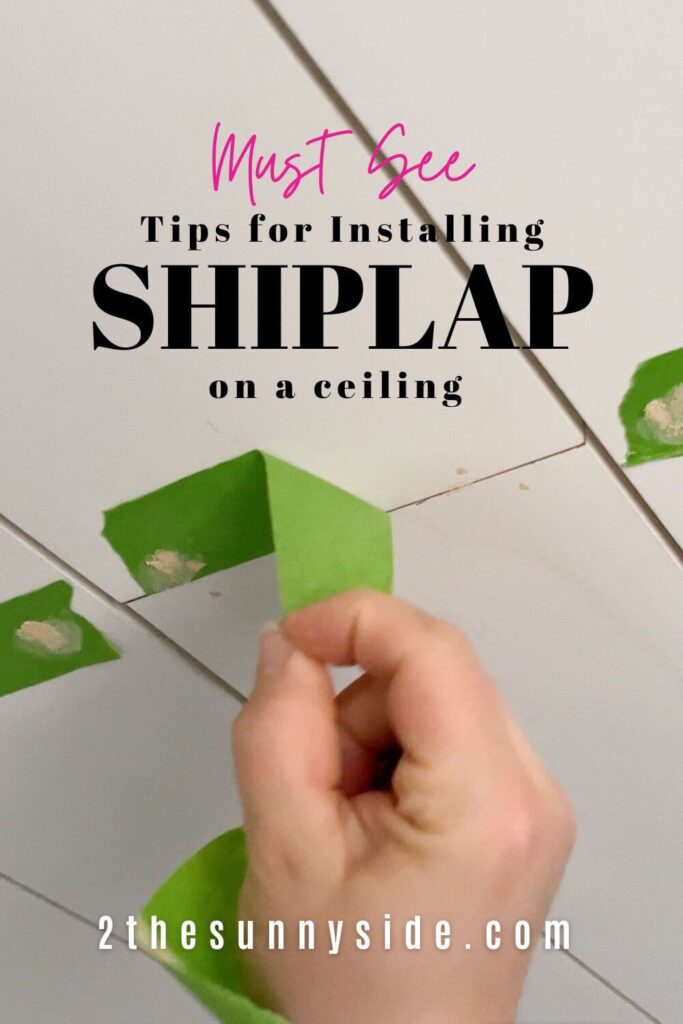
You’ll notice that we placed a strip of painter’s tape where each brad nail will be placed.
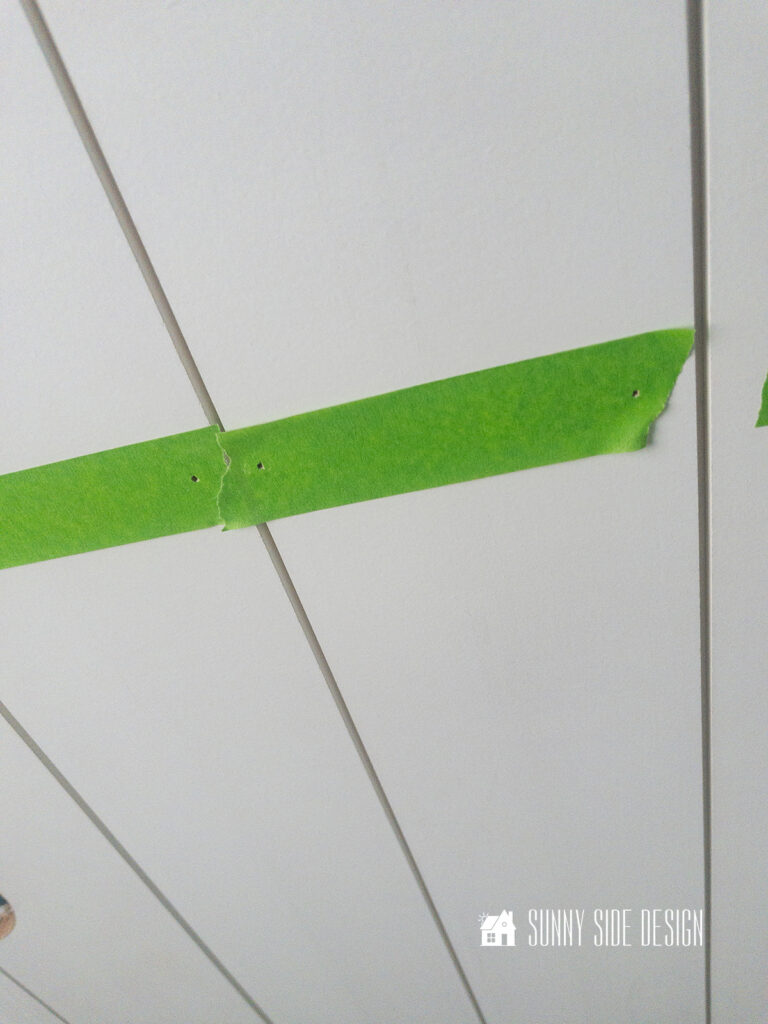
And then inserted brad nail through the painter’s tape.
This is going to save us time when we putty and sand.
If you have butt joints, be sure to press it together firmly and again secure with 2 brad nails.
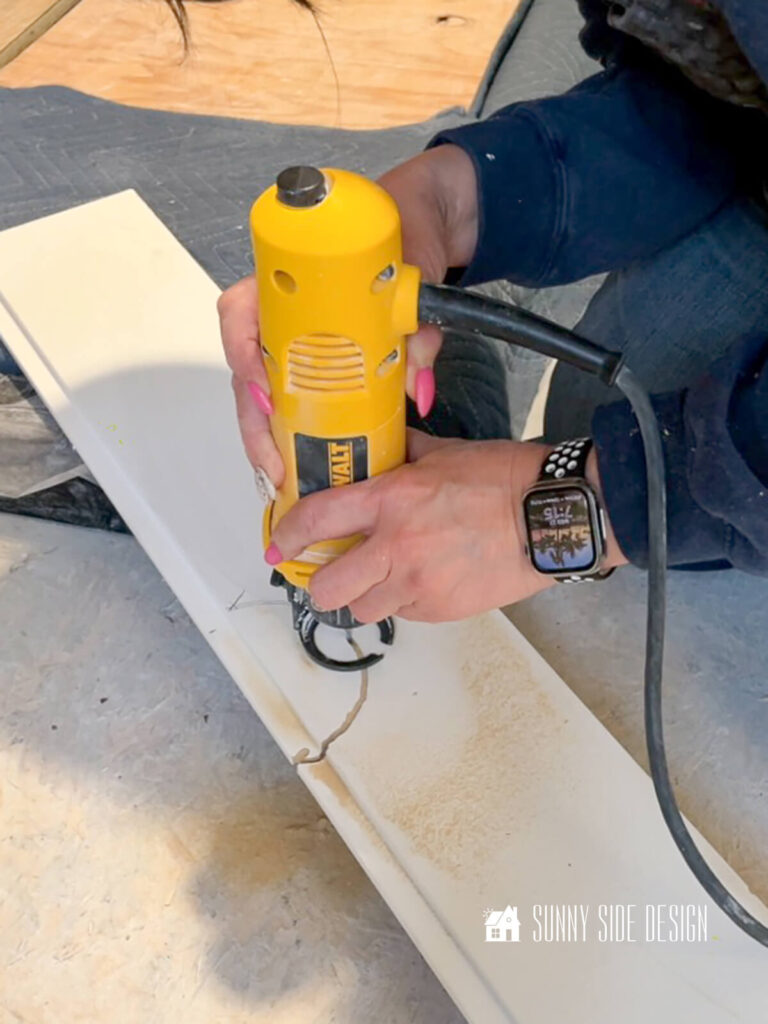
When installing shiplap on a ceiling you’re more than likely to make cuts for light fixtures or exhaust fans.
We measured the location of the light fixture and transferred the cutting guide to the shiplap.
Then we used the DeWalt cutting tool to cut out for each light fixture.
A jig saw is another good option to cut the shiplap for your ceiling light fixtures.
And as we approached the exhaust fan, we again measured and cut the shiplap to fit around the fan.
Continue until you reach the opposite side of the room.
For the final row you will more than likely need to rip down the shiplap to fit.
Let’s stay connected! Follow us on social media!
Prep & Paint Shiplap
We are on the homestretch now!
Wood Filler & Caulk
Filling in all of the nail holes can be tedious, but we have a little hack for you that will save you energy and time.
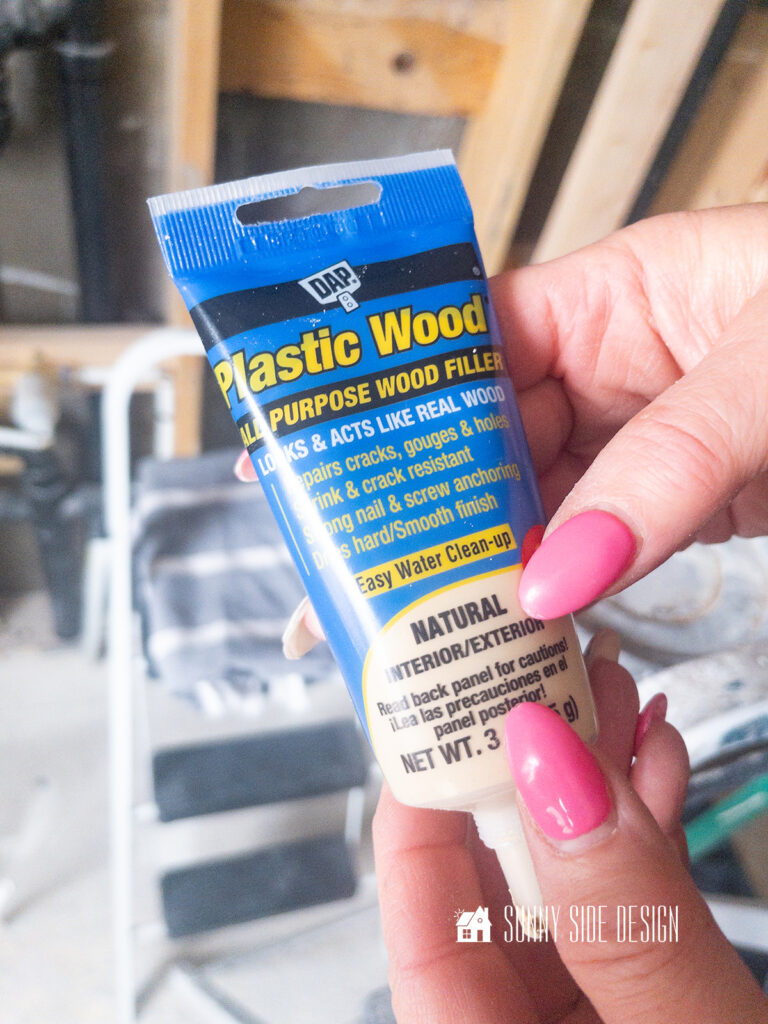
You’ll want to use a wood filler to fill in the brad nail holes.

Place a small dot of wood filler on your finger and press the wood filler into the hole through the painter’s tape.
You’ll want to work it in pressing down, and side to side.
Let the wood filler dry according to the directions.
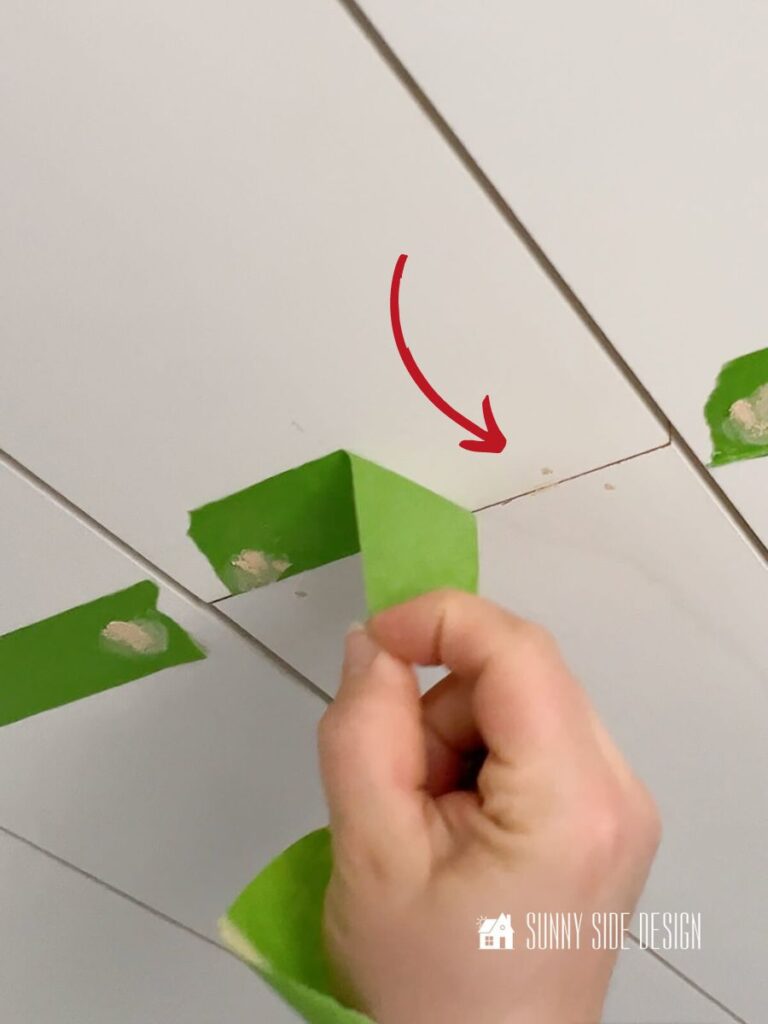
Then pull back the painter’s tape and you’ll be left with a tiny circle of dried wood filler.

Finally sand the wood filler with a fine grit sanding sponge.
One last thing before we finish up this ceiling is to run a bead of paintable caulk along the butt seams.
And if you are not installing moulding around the perimeter of your room, you’ll want to caulk where the shiplap meets your walls.
Paint Shiplap Bathroom Ceiling
Before you begin painting the shiplap ceiling, you’ll want to remove and residual dust.
I took my dusting mop and pulled it along the shiplap.
It worked great and only took 2 or 3 minutes to dust the entire ceiling.
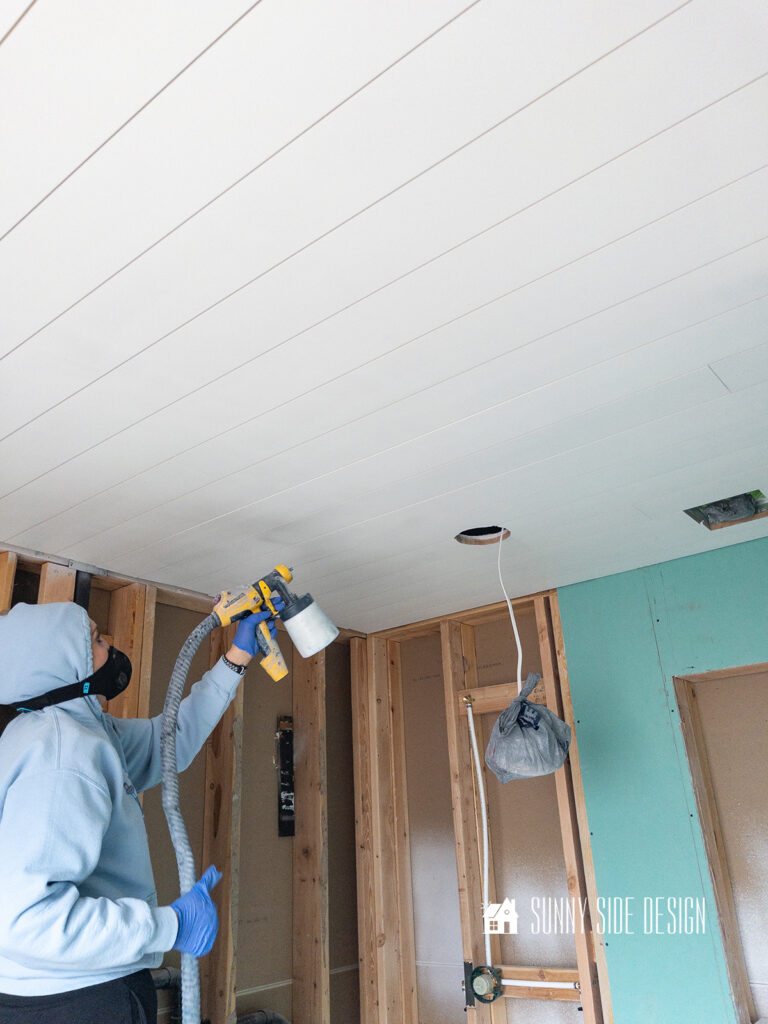
Now you have a couple of choices when it comes to painting, you can use a paint spray or you can roll your ceiling.
I chose to use the Wagner paint sprayer to make sure I covered all of the gap with paint.
Then for the second coat, I used a roller.
If you’re going to use a roller for both coats of paint, I’d strongly recommend painting the gap area before you install it.
Once it’s installed then you can easily roll both coats of paint.
It’s just too difficult to try and fit a paint brush in that narrow gap after it’s installed.
We have two blog posts that will give you the ins and outs of painting shiplap.
- Time Saving Simple Mistakes to Avoid Installing a (Faux) Shiplap Ceiling
- How to DIY a Shiplap Wall the Easy Way
Shop This Project
Disclosure: This post contains affiliate links or referral links for your convenience. It is a way for this site to earn advertising commissions by advertising or linking to specific products and/or services. Click here to read my full disclosure policy.
Final Thoughts
I wish I had gorgeous photos of the finished bathroom with the shiplap ceiling, but the rest of the room is still under construction.
But I promise to add beautiful photos once the bathroom remodel is complete.
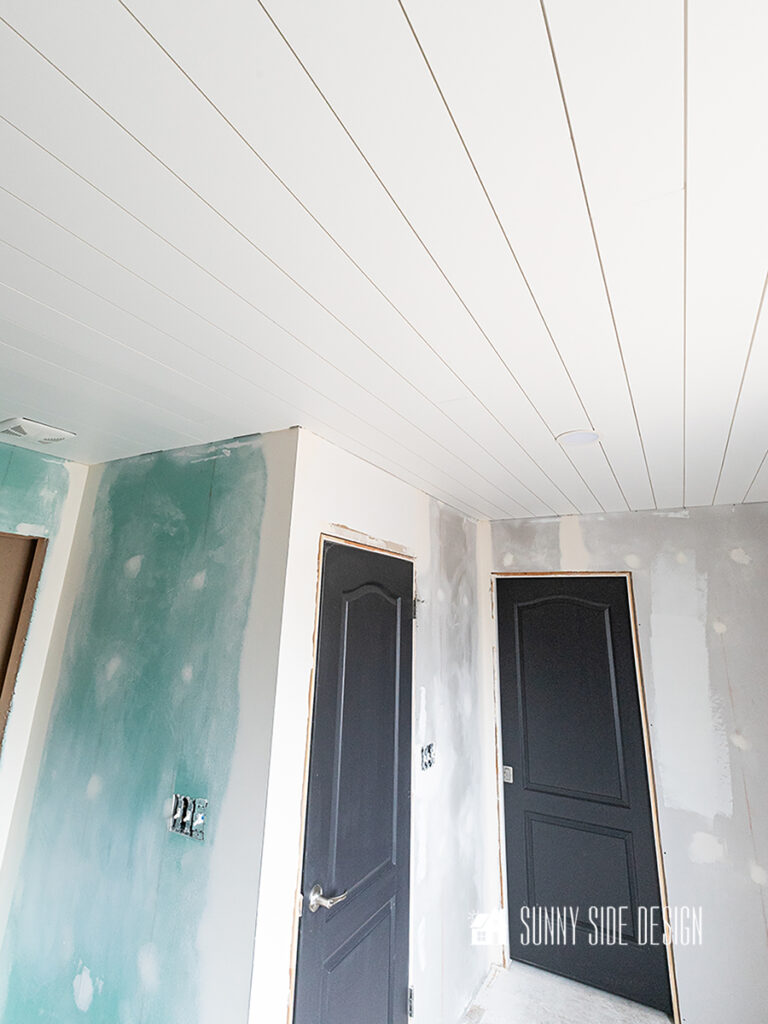
I’m loving the look of the shiplap ceiling and it definitely adds a modern cottage core vibe.
I believe a shiplap ceiling offers more than just aesthetic appeal—it’s a versatile design choice that can significantly impact the look and feel of a room.
Whether you’re aiming to infuse your space with modern cottage charm or create the illusion of more space, the simplicity and timeless allure of shiplap make it a great option.
By following the easy step-by-step guide, you can easily enhance your bathroom with this classic feature.
Is this a feature you’d like to add to your home?
What are your thoughts?
For more ideas to update a bathroom in your home, take a look at these ideas:
- Simple and Stylish Cane Tray
- How to Make a Custom Shower Curtain
- Make a Shower Curtain from a Sheet
- Modern Coastal Bathroom
- Inexpensive Master Bathroom Makeover
- DIY Bathroom Remodel on a Budget
- Fail to Fabulous Bathroom Tile Tutorial
Bathroom Remodel To Do List
- demo bathroom
- move closet wall
- rough in plumbing and electrical
- change swing of door
- repair walls and ceiling
- install shiplap ceiling, paint
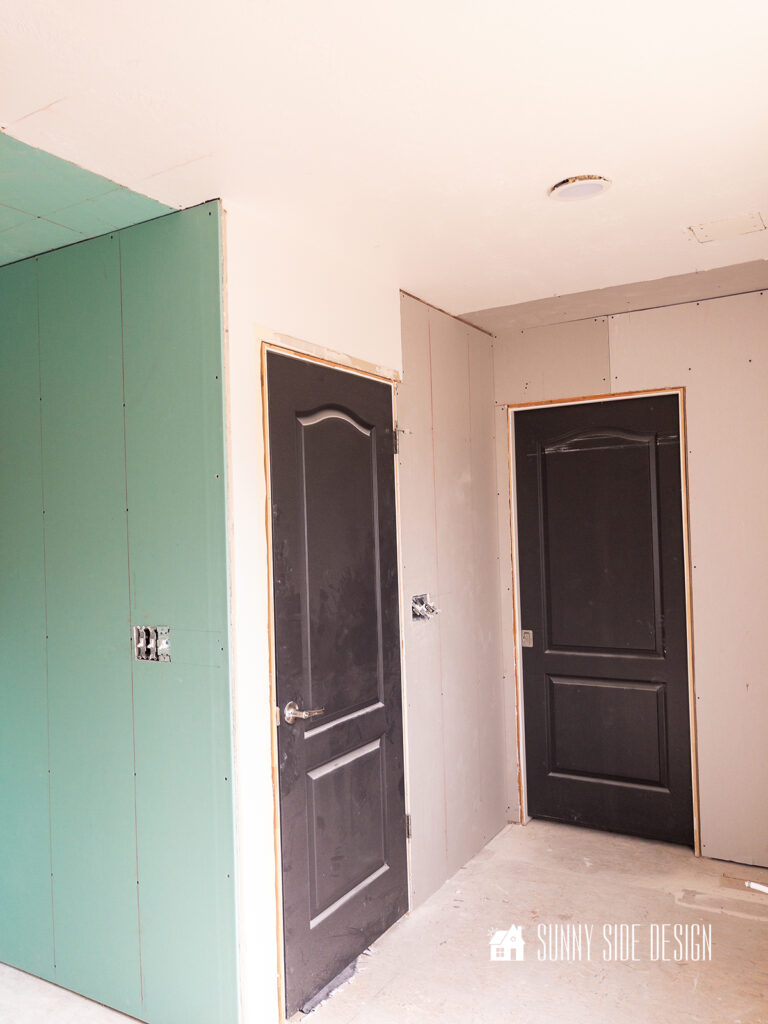
- paint doors
- install shower pan
- paint walls
- install vanity
- prime and paint baseboards
- install cement backer board
- install shower niche
- waterproof shower
- tiling & grout
- install waterproof luxury vinyl plank floors
- install soaker tub
- install plumbing fixtures
- install toilet
- shower enclosure
- recessed shelves
- install lighting
- mirrors
- curtains
- towel hooks
- art and decor
Don’t forget to check out the many other room transformations taking place on the One Room Challenge blog this season.
I believe you’ll be inspired with countless design styles and creative ideas.
If you’re new here, WELCOME! We love having new readers and friends!
You can learn more about us here.
Let’s stay connected! Join our DIY community of doers and you won’t miss the weekly updates on our One Room Challenge and more inspiration for you always on a budget.
Please PIN and save for later, and share with your friends! Sharing helps grow our following!
Sharing is caring!
Thanks for stopping by Sunny Side Design. Empowering you to create a home you love!
DISCLAIMER
This blog’s content is for entertainment purposes only and is not professional advice. By reading this blog and attempting to recreate a project, you assume all responsibility for any injuries or damages incurred. Read my full disclaimer here.
PHOTO USE AND CONTENT SHARING
All of the photographs you see here are the property of Sunny Side Design unless otherwise credited.
We love for others to share our work, so please feel free to use one photo with a link back to our website.
Pinning and sharing is always encouraged!
Please do not reproduce other Sunny Side Design content without permission.
Retailers We Love
- Anthropologie
- Birch Lane
- Crate & Barrel
- Joss and Main
- Lampsplus
- Mark & Graham
- One Kings Lane
- Pottery Barn
- Rejuvenation
- Serena & Lily
- Wayfair
- West Elm
- Williams Sonoma
- World Market
Be sure to follow us on Pinterest for even more home decor and DIY ideas.
To see what we are working on before it’s on our blog, follow us on Instagram.
You will also find our video tutorials on our YouTube channel.
 How to Build a Simple and Affordable Shower Niche
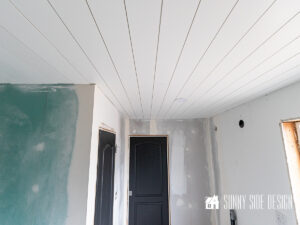 Add Character with an Easy Shiplap Bathroom Ceiling
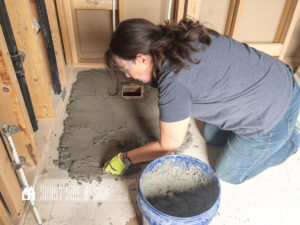 How to Install a Prefab Shower Pan in Your Bathroom
 Sensational Master Bathroom Design Plans to Spark your Creativity
The post Add Character with an Easy Shiplap Bathroom Ceiling appeared first on Sunny Side Design.


