

Elevate your home with this DIY ribbon memo board tutorial. It’s a cozy, cottagecore inspired project that adds style, organization, and warmth to your space.
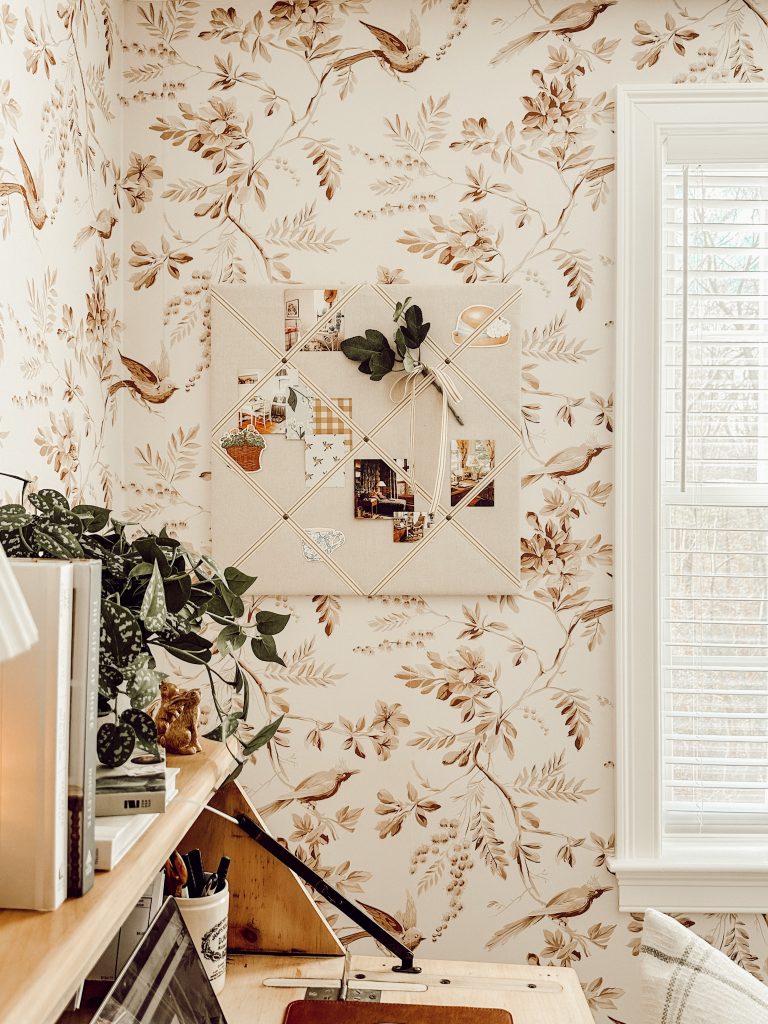
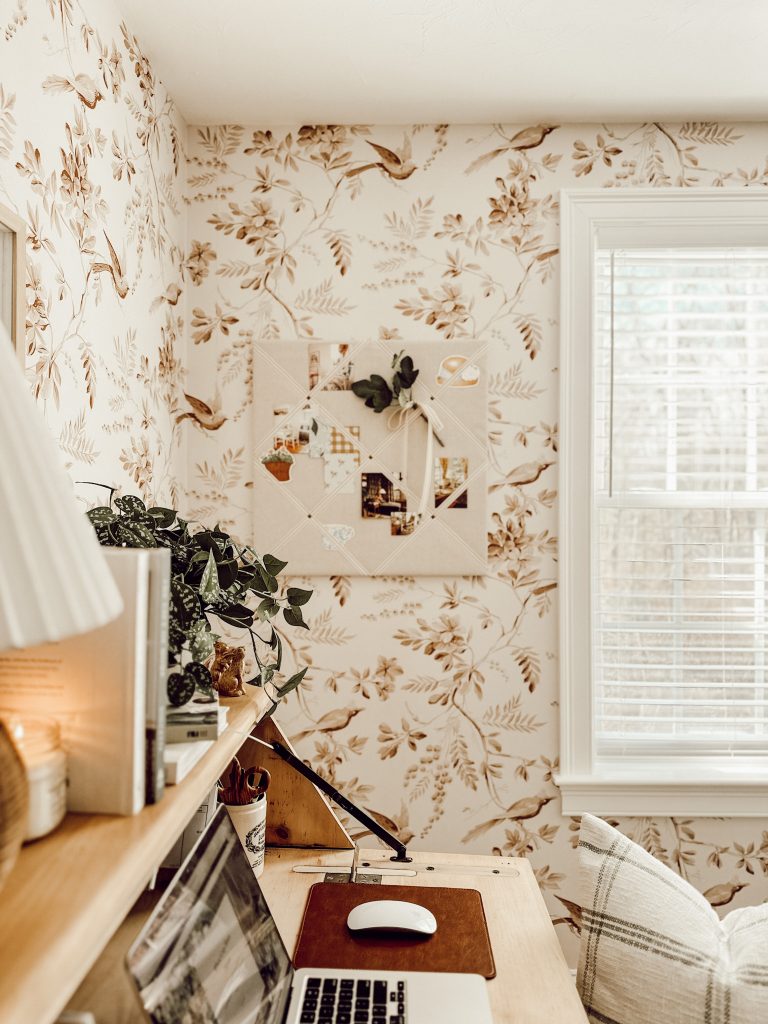
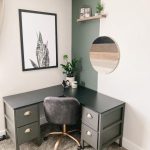
When we started construction on our home office, one of the things I knew I wanted to hang on the wall was a ribbon memo board.
A spot to tuck notes, photos, and lists in a beautiful way.
So, when construction began to wrap up a couple of weeks ago, I began my search for the memo board I had envisioned for the space.
Well, let me tell you…that search was not as easy as I thought it was going to be!
The ribbon memo boards I found were either too small or too big, or the pattern of the fabric was not what I wanted.
A few weeks ago, one of my favorite blogger’s Liz Marie, shared a blog post on how to upcycle a thrifted memo board, and I thought why couldn’t I DIY my own!
The process is easy and I’m sharing the step by step guide with you today.
All you need are a few supplies and you’ll have a cozy DIY ribbon memo board that reflects your personality and exudes cottagecore charm in no time at all.
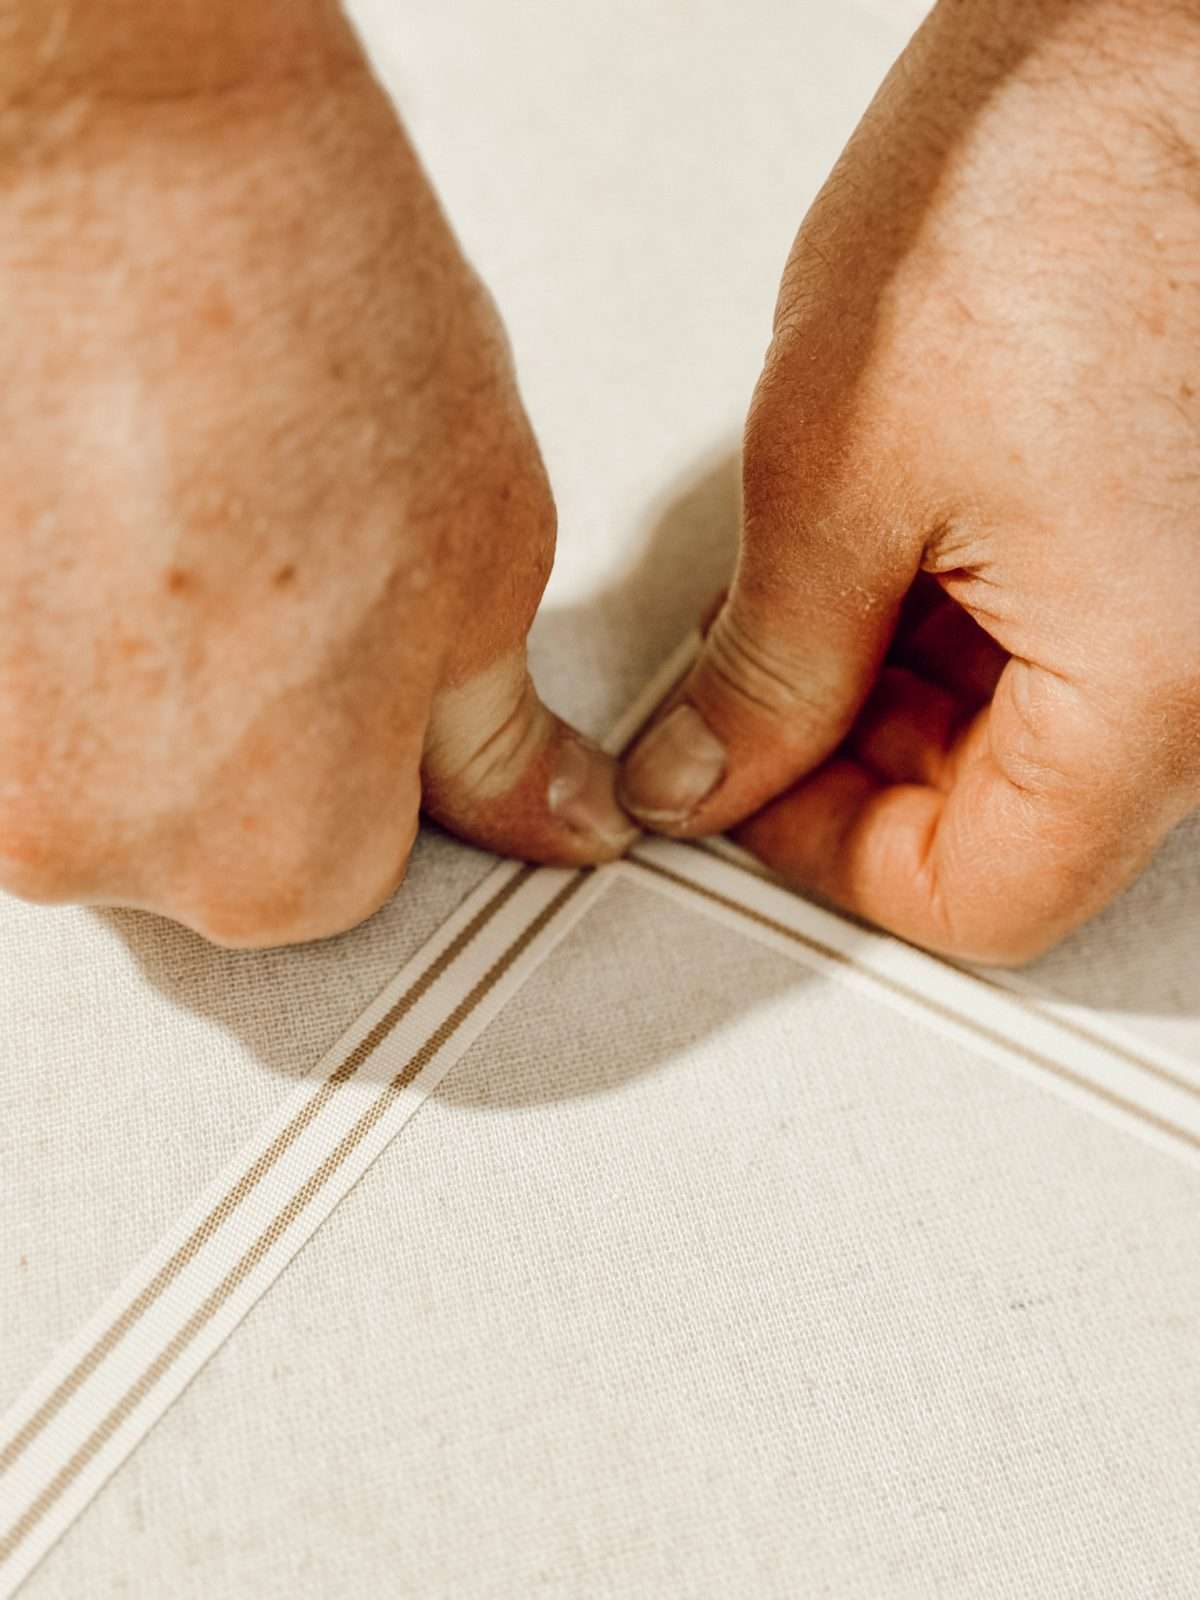
I’d like to give a big thank you to Mr. ERH for helping me with this DIY and (reluctantly) agreeing to be the hand model so I could take photos of the step by step process!
What you’ll love about this diy:
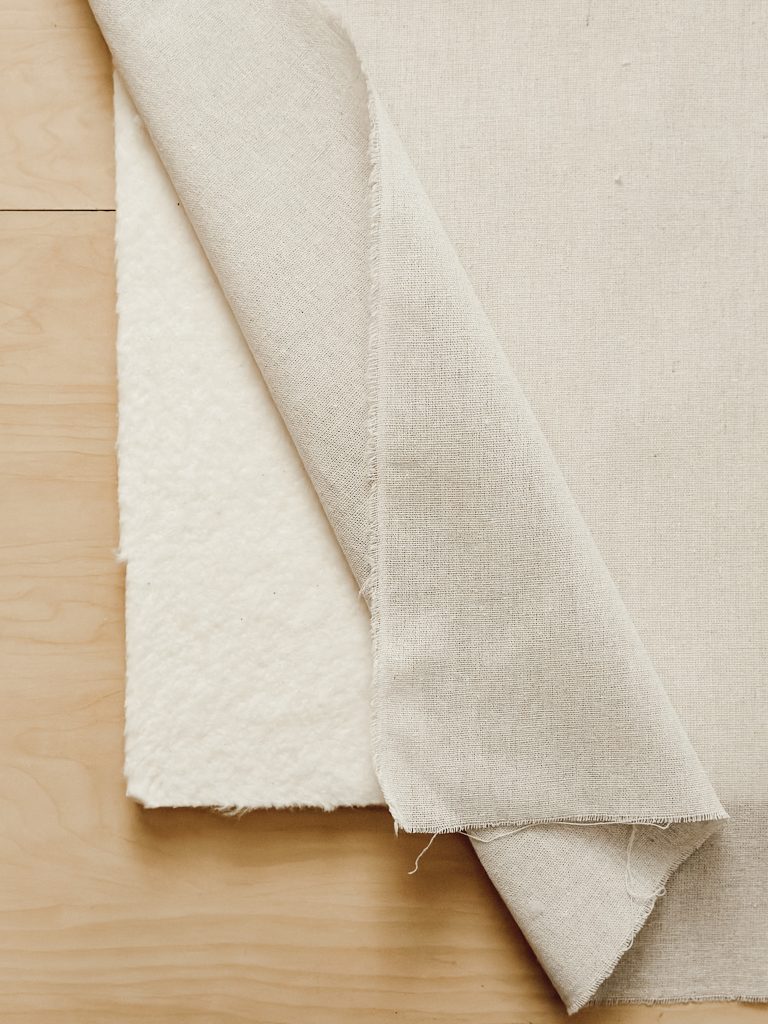
Materials You’ll Need to Make This DIY Ribbon Memo Board
The best part about making your own memo board is that you can customize it to make it your own by simply changing the fabric and/or ribbon.

Here are the supplies you’ll need to create this DIY project…

Step by Step Guide to Making Your Own DIY Memo Board With Ribbon
With just a few supplies and a little bit of time, you’ll have a functional piece of art that will keep you organized and adds a little handmade warmth to your home decor.
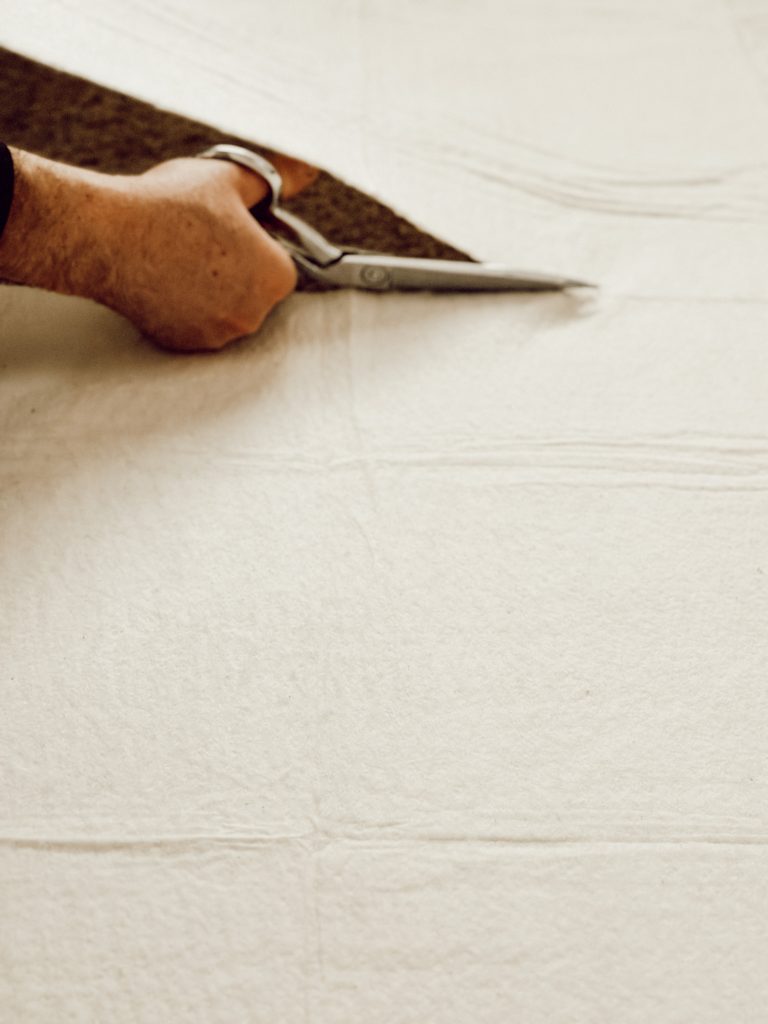
Measure & Cut the Cotton Batting
Take your 24″ square piece of plywood and lay that down on the cotton batting.
With a pencil, trace an outline of the plywood square on the batting, and then cut out the square shape with sharp scissors.
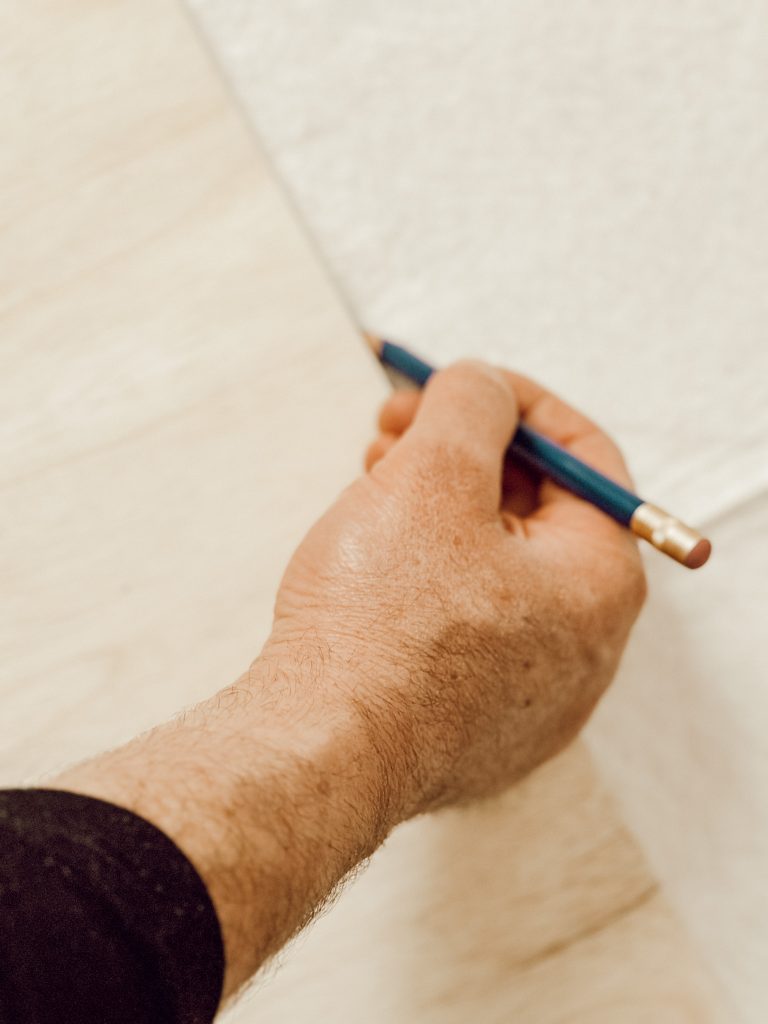
Repeat this so that you have (2) 24″ squares of cotton backing.
Glue the Batting to the Plywood
On a covered surface, spray the adhesive to one side of the plywood. Wait about 30 seconds (or until glue becomes tacky) then place one of the cotton batting squares onto the glue.
Gently press the batting onto the plywood, smoothing out all wrinkles and air bubbles.
Once that piece of batting is secure to the plywood, spray the batting with adhesive, wait 30 seconds, and then place the 2nd cotton batting square onto the first one.
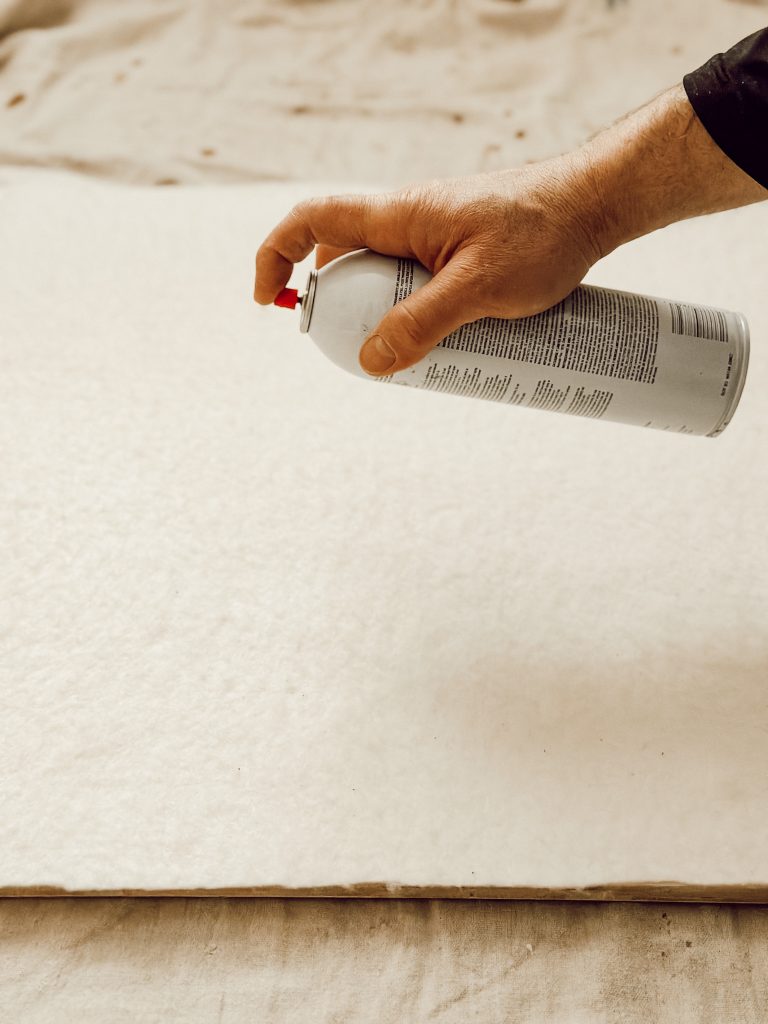
Smooth out wrinkles.
If any of the cotton backing is hanging over the edges of the plywood, you can use the scissors to trim the batting accordingly.
Basically, you just want the batting to cover the front of the memo board, not the sides or the back.
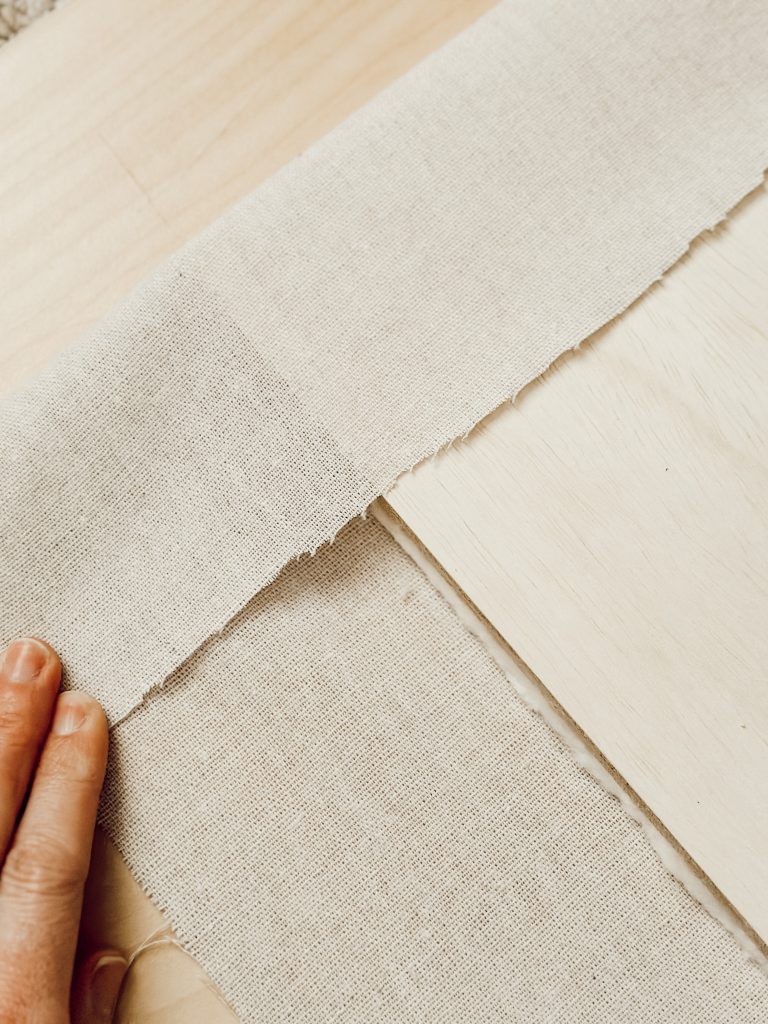
Cover the Board & Quilt Batting With Fabric
Place the 26″ square of fabric over the batting, ensuring there is about 2″ of fabric overhanging each side of the square.
If your fabric has a pattern, you’ll want to make sure the pattern is straight before you begin to secure it to the board.
Carefully flip the fabric and the board over.

Pro Tip: Before you begin wrapping your memo board with fabric, give it a professional touch by ironing the fabric beforehand. This simple step not only eliminates wrinkles but also ensures a smooth and taut surface.
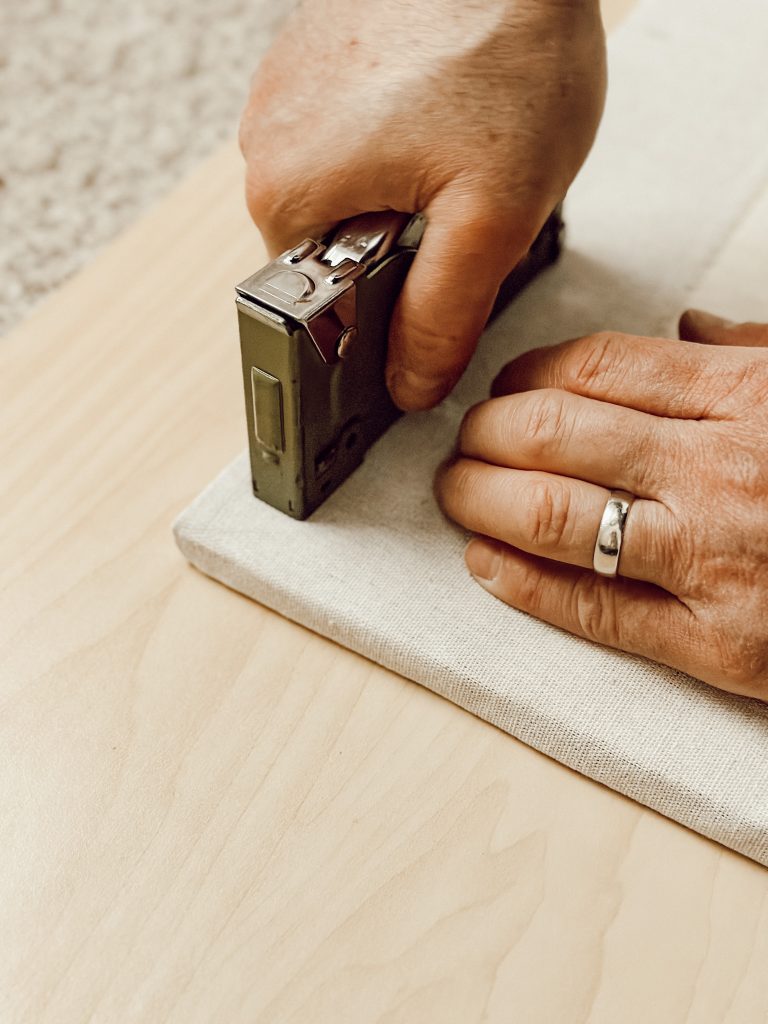
On the top of the board, fold the fabric over onto the back of the plywood and secure with a staple. Continue stapling the fabric along the top of the board until it is secure.
Move to the bottom of the board, pull the fabric taut, then secure with a staple. Continue stapling the fabric along the bottom of the board, making sure to pull the fabric tight each time.

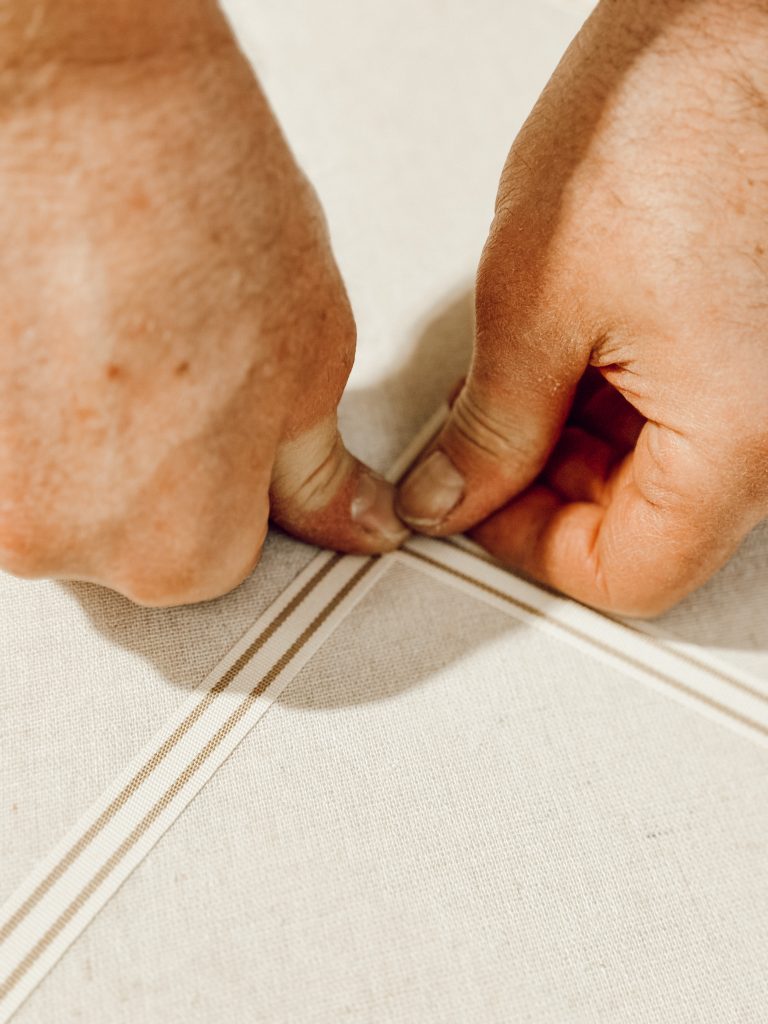
Before moving on to the sides of the memo board you’ll want to finish the fabric corners, which might seem a little tricky, but they’re easier to complete than you might think!
Download Your Free Cozy eBook
Take the corner of the fabric and bring that down the side of the plywood where you haven’t attached the fabric yet.
You’ll have a little bulge of fabric against the board but that’s fine (you won’t see it when the memo board is completed).

Bring the fabric overhanging the board straight across, pull taut, then add a staple.

Look at that nice, crisp corner!
Do this to all 4 corners.
Once the corners are completed attach the fabric tightly on the two remaining sides with staples.
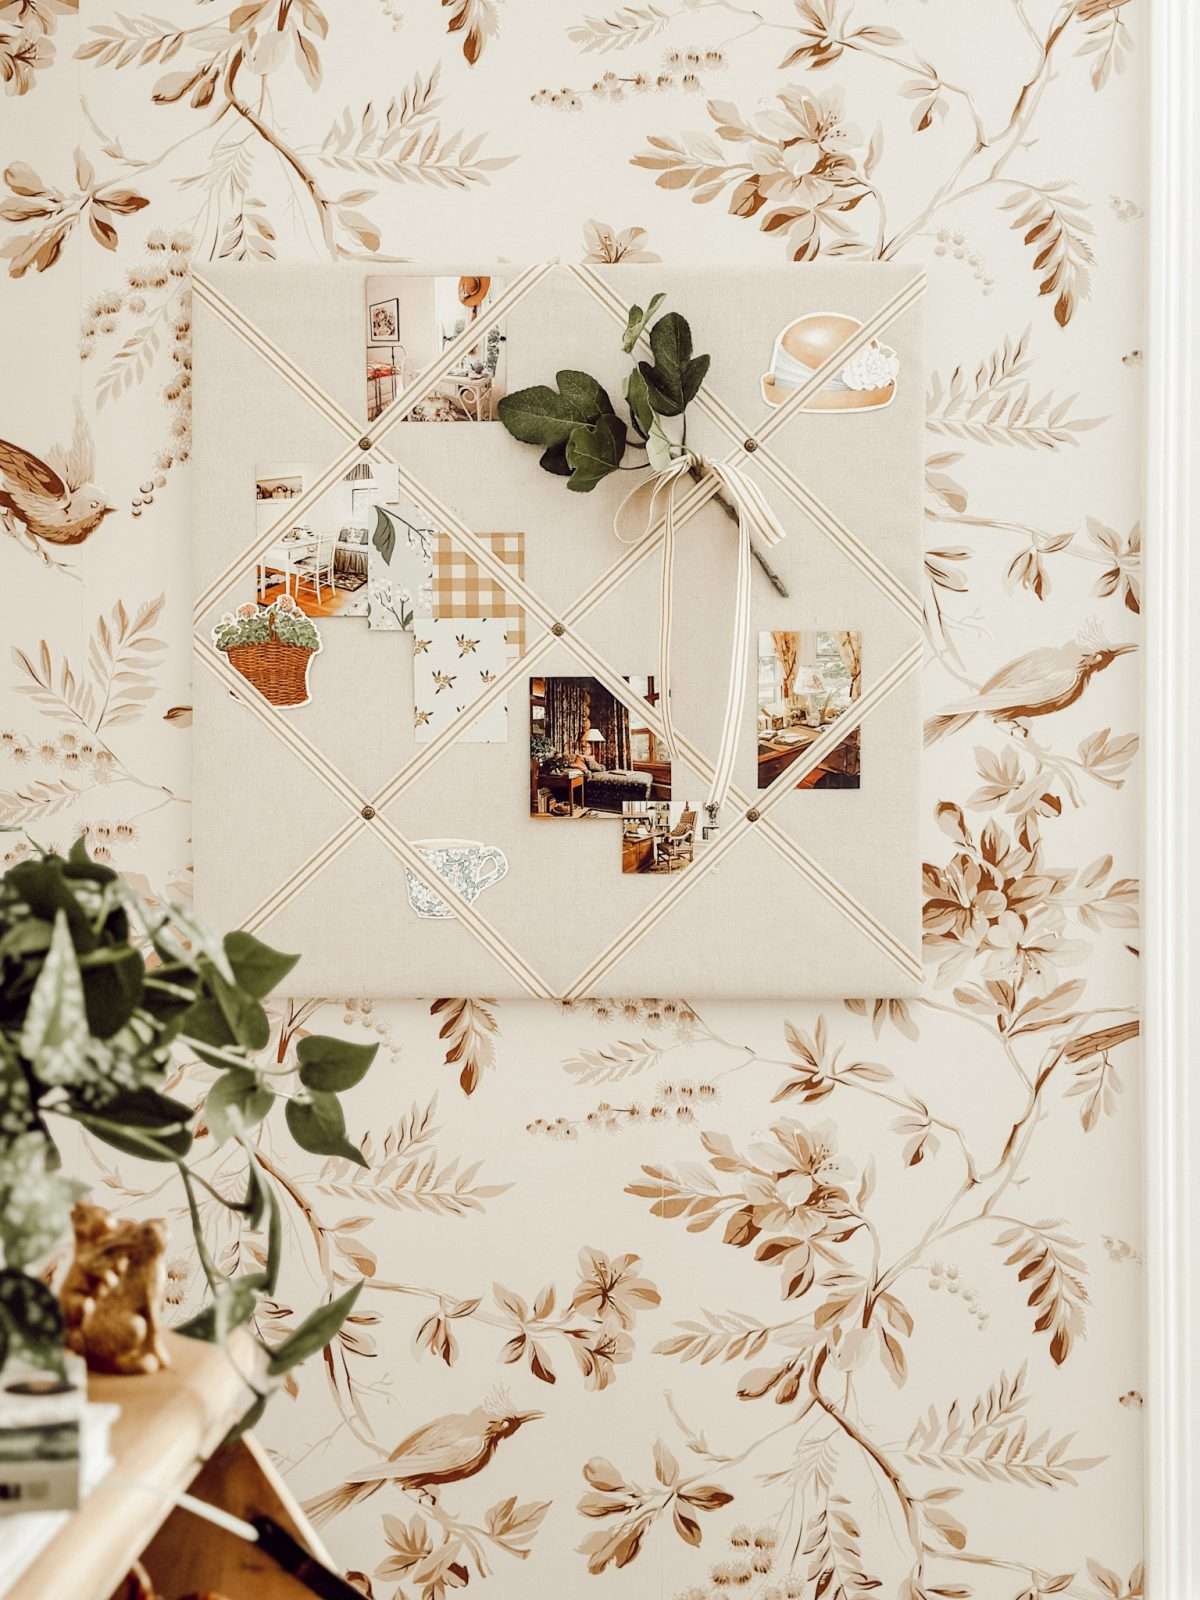
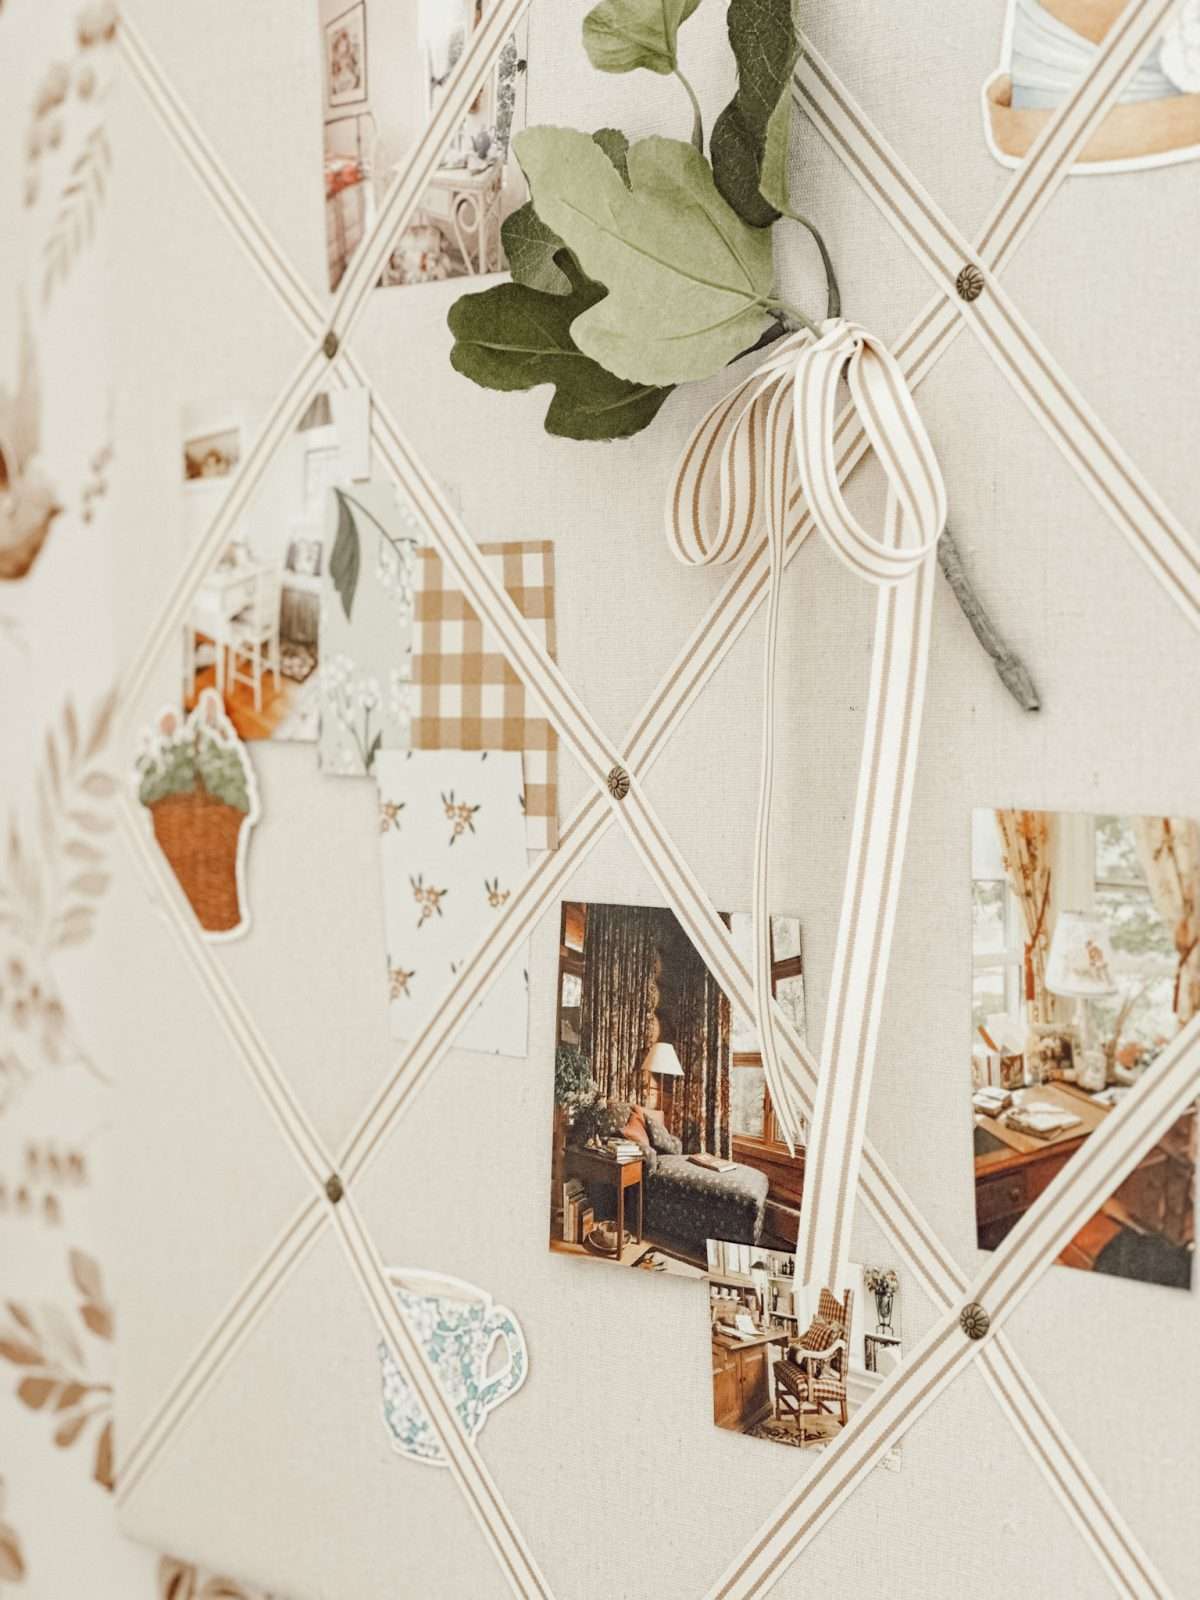
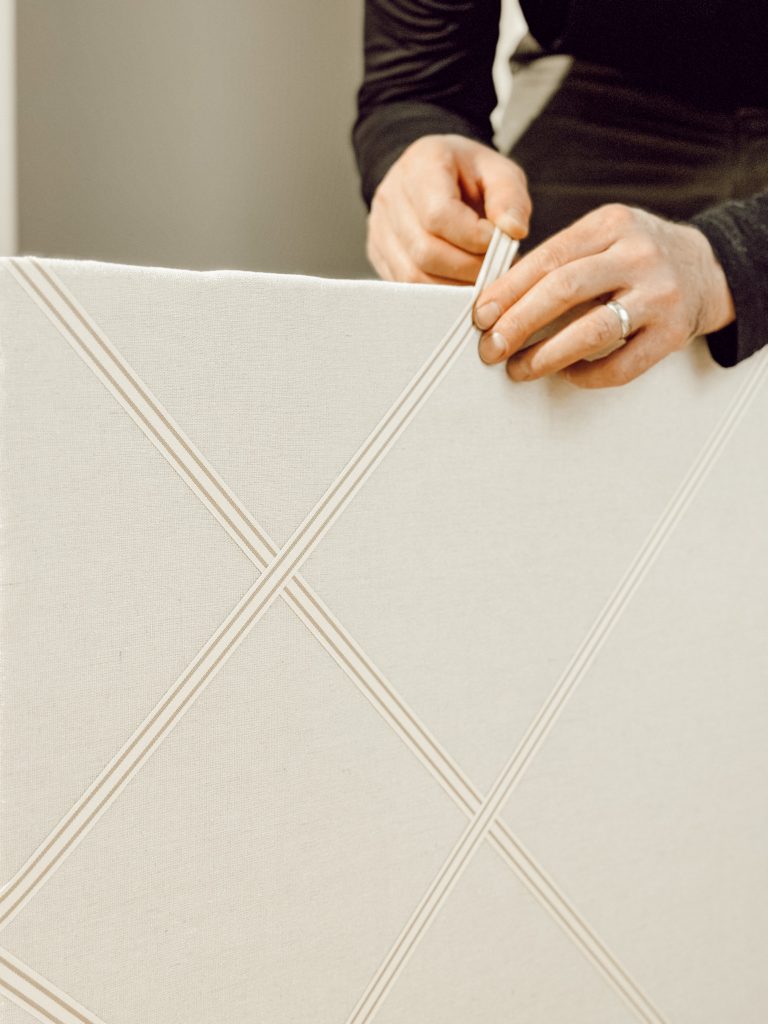
Add the Ribbon
This is the fun part and where you’ll see your vision come to life!
Staple (2) 26″ long strands of ribbon to the back of the top two corners of the board.

Bring the ribbon diagonally across the board, pull the ribbon very tight, and attach the ribbon with a staple to the back of the board.
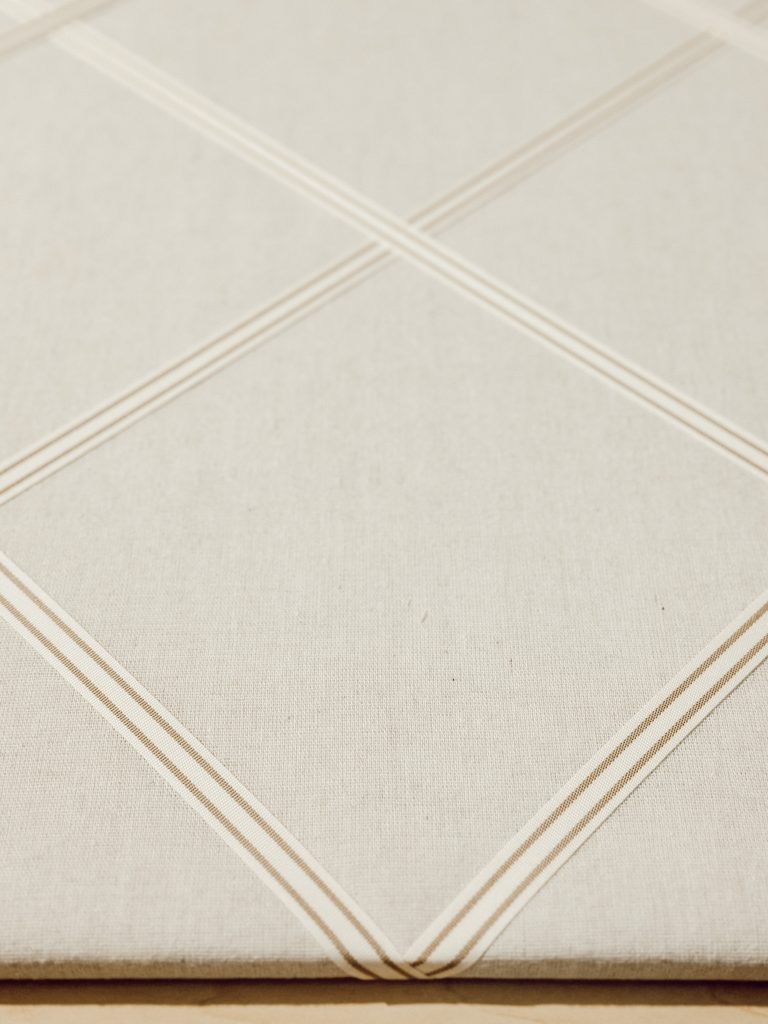
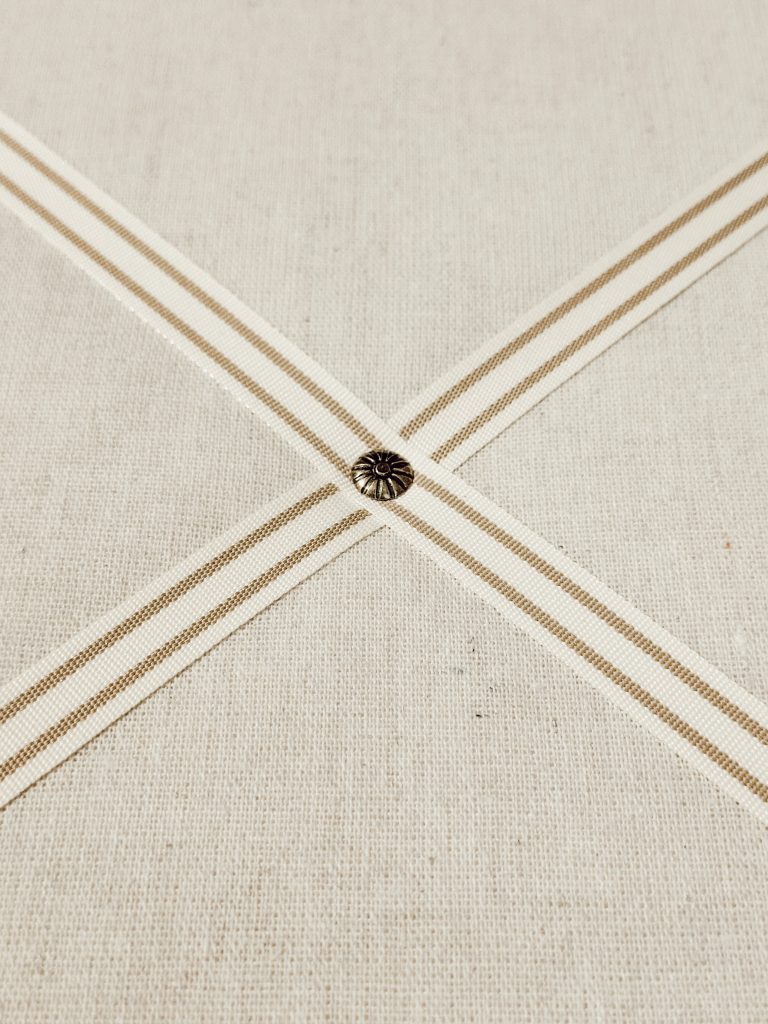
The ribbon should make a large X on your memo board.
Next, starting on one side of the board, staple (2) 13″ long strands of ribbon in the middle (12″ should be the center) of that side.
Pull that ribbon tightly to either side of the board, and secure with staples to the back.
Continue around the board until you have criss cross sections. There should be 2 pieces of ribbon attached to each side of the memo board every 12″.
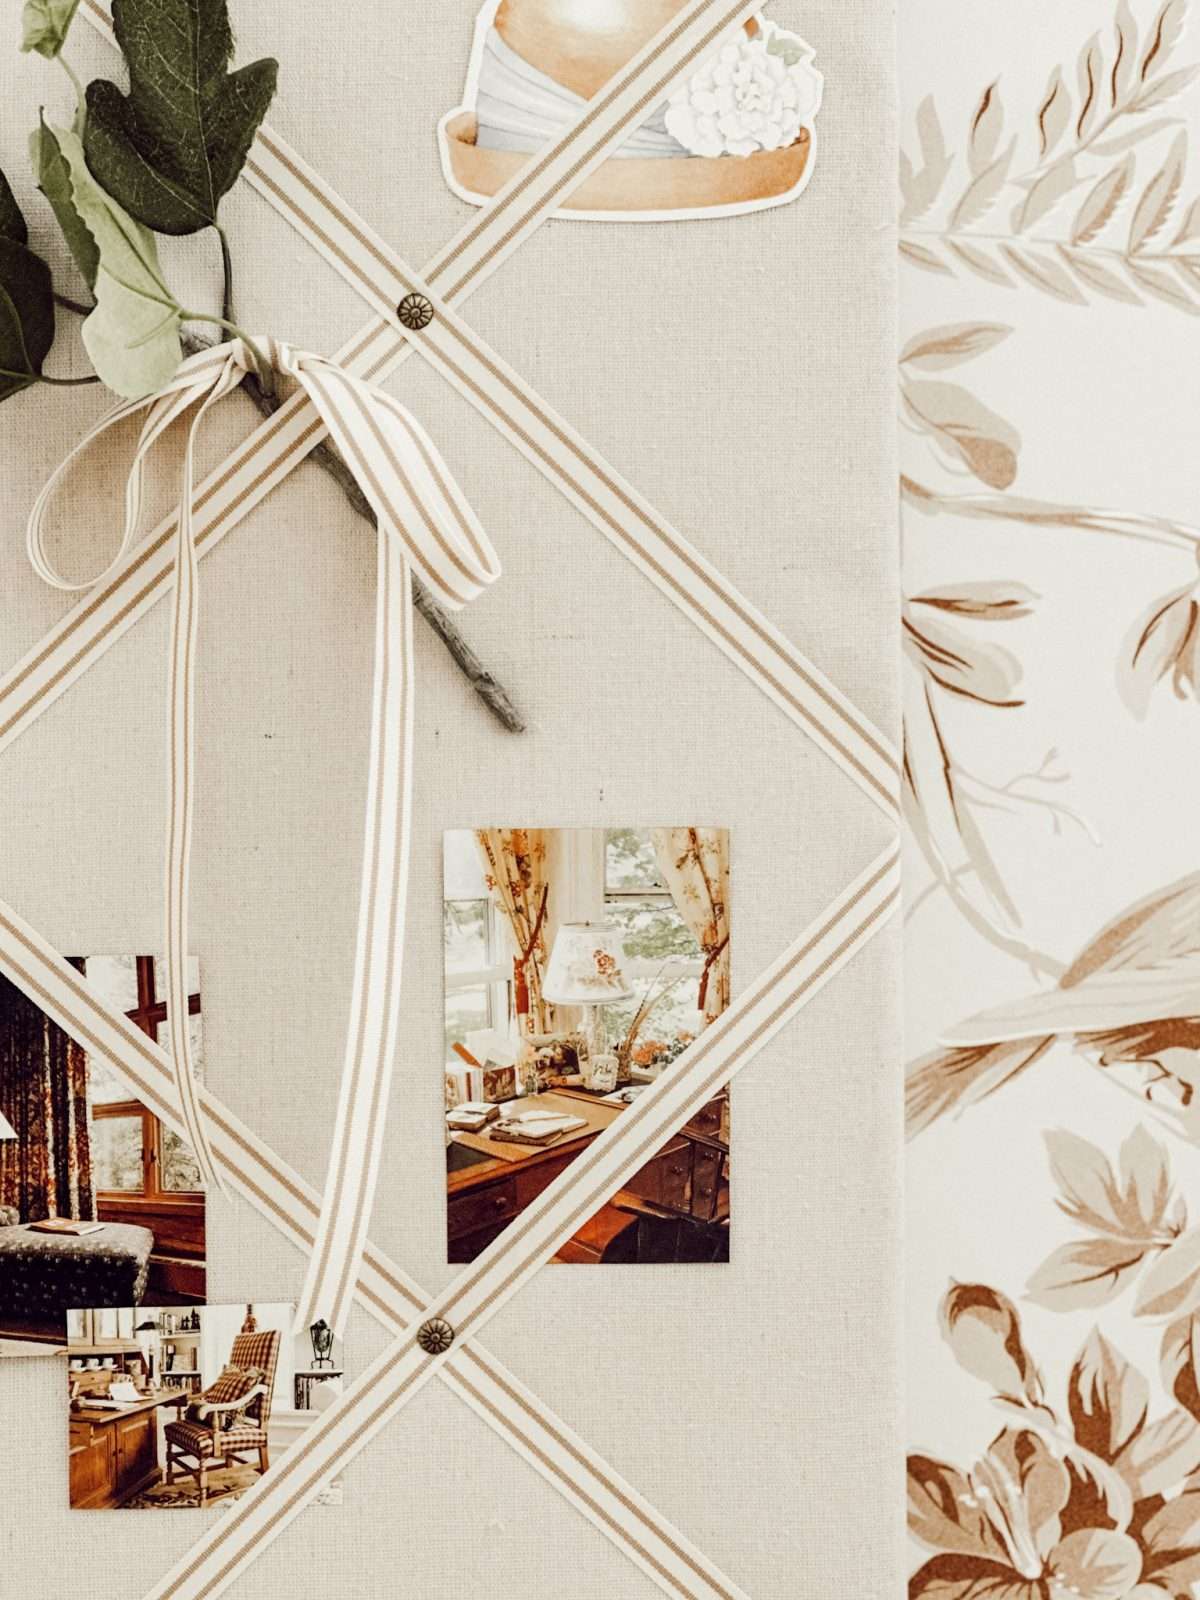
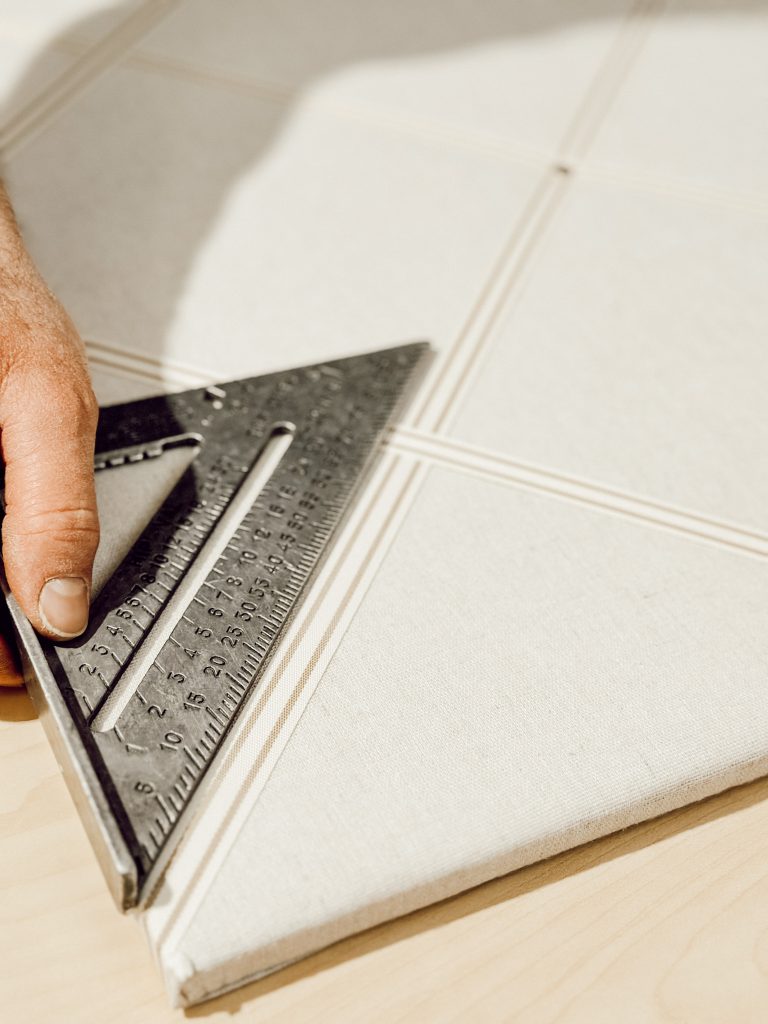
Finish With Upholstery Nails
To finish the memo board, place an upholstery nail at each ribbon intersection.

Mr. ERH used a tape measure and triangle to make sure each section was even before adding the nails, but if don’t want to get that technical that’s completely up to you!
You can simply push the nails into the memo board or you can use a hammer or mallet too.
Push the nail in as far as you want into the board.
I wanted each section to look a little raised, so we pushed the nails pretty far in. Just be sure they don’t come through the back of your plywood.
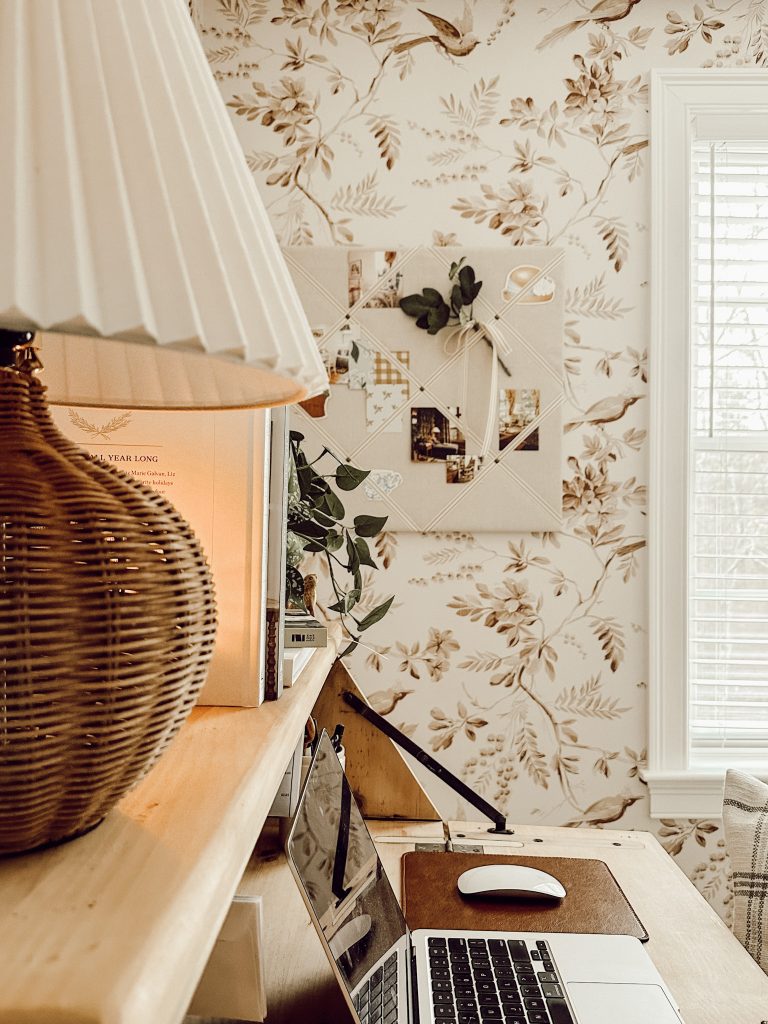
Hang Your Completed Fabric Memo Board
With your DIY ribbon memo board complete, it’s time to hang it!
Since we switch up decor in this house as much as some people change their underwear, we’ve come to love command strips.
They’re an easy way to hang something (even on wallpaper) without leaving holes in the wall that you eventually have to fill later.
If you’re not a fan of command strips, you can add a sawtooth hanger to the back of your memo board and then hang on the wall.
- If your batting, fabric, or ribbon is wrinkled; you might want to consider ironing it before securing to board for a clean, polished look.
- Don’t be afraid to experiment with different fabrics and ribbons to match your style or seasonal preferences.
- Ensure a smooth and wrinkle free surface by carefully wrapping the fabric around the board. Start in the center of one side and work your way to the corners, pulling the fabric taut as you go.
- Make sure the nails go through the ribbon, fabric, and into the plywood.
- Adjust the size of your memo board based on where you intend to use it.
- Embrace imperfections. They add character to your ribbon memo board!
Can I add a frame to my DIY memo board?
Absolutely!
Adding a frame to your pin board can elevate its appearance and provide a polished finish.
Hey friend! What can I help you find?
Search our entire site!
Choose a frame that complements the style of your fabric memo board. Use a wooden frame for a rustic feel or a vintage frame for a cottagecore look.
Just make sure the frame is slightly larger than your memo board to create a pretty border.

FAQs: DIY Ribbon Memo Board
What can I display on my fabric memo board?
You can hang anything on your memo board! It’s such a great way to display a variety of items.
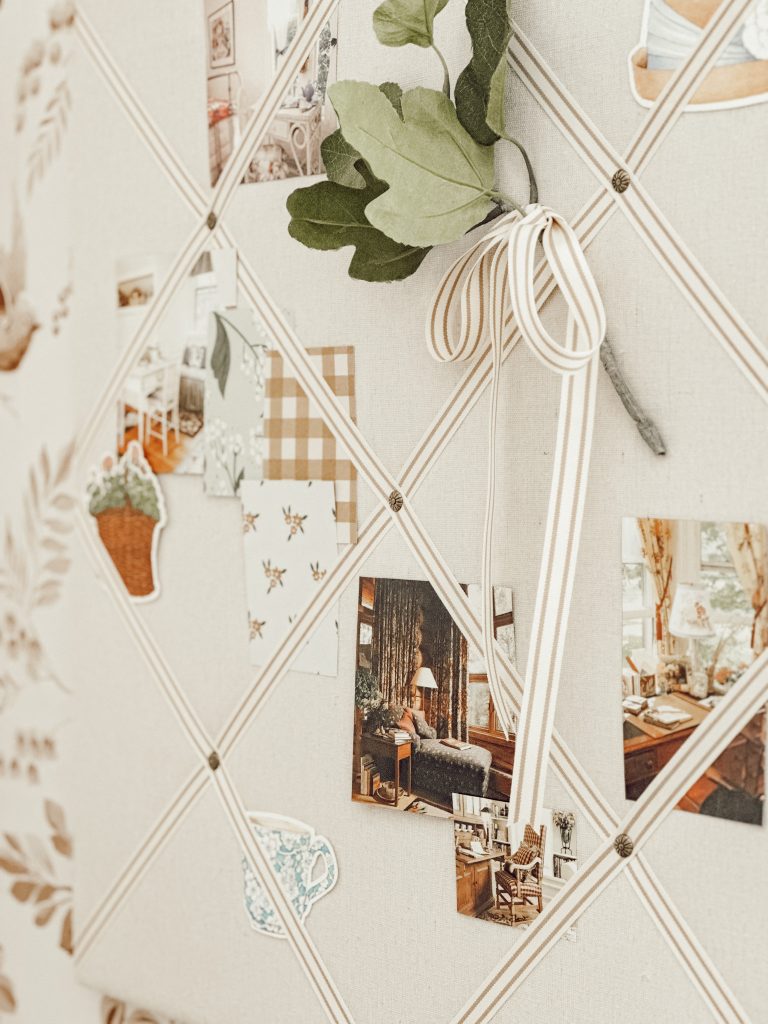
Here are some ideas…
- Notes & Reminders
- Photos
- Artwork & Prints
- Inspirational Quotes
- Invitations & Tickets
- Fabric Swatches
- Postcards & Travel Souvenirs
- Recipes or Meal Plans
- Seasonal Decorations
- Fabric Swatches
Feel free to get creative and switch things up whenever inspiration strikes!

Ready for more creative ideas?! Explore the blog for a treasure trove of easy DIY projects that will inspire your imagination and add a touch of handmade charm to your home.
Shop My Favorite Products
Shop my favorite home decor & lifestyle products, my LTK sources, and my Amazon Storefront. By making a purchase with one of my affiliate links, I earn a small commission which helps me continue to create meaningful content for you!
I look forward to sharing more of my home with you and inspiring you to have a well loved home! Follow me on Facebook, Instagram, Pinterest, and LIKEtoKNOW.it.
xoxo, heidi
Don’t forget to pin this for later…
shop the post


